As sharing is caring, in this article you will find some good lectures and curious experiments.- FusionWorks
One of my favorite definitions of ”Memory” is that this represents the process of maintaining information over time. Our memory helps us discover the world. We do not need every time a lot of information to absorb and to try to figure it out dealing with classifications or comparison.
There are moments when, being too engaged in an activity we forgot some elementary staff like to eat, to respond to a message, etc. In the era of information, it is a priority to understand fast and proceed to complete future tasks instead of analyzing what do we miss.
A large part of the research on memory is based on experiments conducted in laboratories. Those who take part in the experiments — the participants — are asked to perform tasks such as recalling lists of words and numbers. Both the setting — the laboratory — and the tasks are a long way from everyday life. In many cases, the setting is artificial and the tasks fairly meaningless. Does this matter? How can this help?
Memory is a single term that reflects a number of different abilities: holding information briefly while working with it (working memory), remembering episodes of one’s life (episodic memory), and our general knowledge of facts of the world (semantic memory), among other types. Remembering episodes involves three processes: encoding information (learning it, by perceiving it and relating it to past knowledge), storing it (maintaining it over time), and then retrieving it (accessing the information when needed). Failures can occur at any stage, leading to forgetting or to having false memories. The key to improving one’s memory is to improve processes of encoding and to use techniques that guarantee effective retrieval.
This article is powered by Empy.io — an all-in-one tool that helps HRs synchronize with the employees and handle all the internal requests in one single place. Try it for free!
Increasing your memory may help you in different manners. Firstly, you will force your brain to think, you will exercise it and make it stronger. Secondly, you will be much more productive. And third — your general well-being will increase as a result of self-esteem. Does this sound perfect? It is also easy to achieve!
Associate — combine what you want to remember with what you already know. You can associate places with people, names with songs, phone numbers with birthdays.
Practice — our brain has supernatural powers if we have enough patience to develop them. We can calculate in mind, memorize a voluminous number, or complete sudoku, what do you choose?
Focus — when we learn something new and quickly forget, we blame our memory, when in fact we were not paying attention to what we were doing. When you do something (or learn) dedicate yourself to the activity 100%. Being fully involved you will be surprised by the results!
Chewing gum — some research has shown that chewing gum improves memory. Thus, chewing gum during an exam can make it easier to remember everything we have learned.
Build a palace of memory — it’s an exercise for hundreds of years, but just as great. According to this technique, we are supposed to remember more easily anything with the idea that we have visual memories related to that something (it doesn’t matter if it’s real or imaginary).
Avoid stress — felt for a long time, stress affects the normal functioning of the brain, therefore decreasing memory capacity. As much as we can, let’s avoid it, finding more time for relaxing.
Get enough sleep — if your sleep doesn’t reach at least 7 hours a night, your brain has nowhere to take energy to function wonderfully.
Eat healthily — scientific studies have shown the link between food and memory. So, in order to improve it, we need vegetables, fruits, seafood, and green tea.
Keep fit — if your body is healthy, so will your mind. Exercising 20 minutes a day, we will look more beautiful not only physically, but also in terms of memory.
Read — you can improve your creativity by reading something special and imagining your video. In this way, you put your brain to work, and during the construction of images, you also develop your memory.
Yes, it seems like all these techniques are viable and all of them may be experienced very simply, but could these also feed the Misinformation Effect?
In a famous experiment conducted by Loftus, participants were shown video footage of a traffic accident. After watching the clip, the participants were then asked a number of questions about what they had observed, much in the same way police officers, accident investigators, and attorneys might question an eyewitness.
One of the questions asked was, “How fast were the cars going when they hit each other?” In some instances, however, a subtle change was made; participants were instead asked how fast the cars were going when they “smashed into” each other. What the researchers discovered was that simply using the word “smashed” instead of “hit” could change how the participants remembered the accident.
A week later, the participants were once again asked a series of questions, including “Did you see the broken glass?” Most of the participants correctly answered no, but those who had been asked the “smashed into” version of the question in the initial interview were more likely to incorrectly believe that they had indeed seen broken glass.
How can such a minor change lead to such differing memories of the same video clip? Experts suggest that this is an example of the misinformation effect at work. Other interesting experiments that seem curious.
”…the most efficient way to make your employees happy is to understand their needs and mindsets.” — FusionWorks
A happy employee is a productive one. This is why it is very important to understand what makes not any, but YOUR employees happy. Knowing the individual motivators we may share care and strengthen what really matters.
Yes, it is priorly to allocate resources for employees’ motivation. What drives someone starts with communication. An empathic, non-violent (reading recommendation), and assertive one — this is when we learn to understand our employees, not only pretend we do. Mental and physical health at work is totally dependent on the working atmosphere. If you need a healthy employee you have to work on his / her well-being. This is a long process. Do not be scared or afraid when results will need time to be seen. This is normal. Below will be listed some crucial axioms to control and influence your employee motivation and in this way — to help them become the best versions of themselves. All of these were summarized while tested in time, on different employees (the difference was in one or some of these factors: age, gender, interests, temperament, education, and background), and could be used as steps for employee-admiration.
When satisfaction and benefits are in a correlation with work-volumewe see a happy employee. We may easily monitor this correlation with 3 simple tools: 1–1’s, onboardings, performance review (in ideal cases onboardings and performance review meetings will be conducted by TL & HR), questionnaires (with direct questions and metaphorical ones, anonymous and not). Honestly, first in this list is my favorite tool, as during 1-on-1 it is very easy to understand the person you interact with. And this is much more than words. Here every single gesture is special and every single selected topic is crucial. Without a psychological background, things could be a little more challenging, but we are so lucky! A lot of information is available online and after some search and good reading — anyone could coordinate an awesome 1–1. Another advantage is that no 1-on-1 is the same. So, this kind of discussion is fascinating!
This article is powered by Empy.io — an all-in-one tool that helps HRs synchronize with the employees and handle all the internal requests in one single place. Try it for free!
2. Leaders influence employees. All of us need approval, no matter how old or how experienced we are. Being in a room where you have a leader, you need to understand that he/she is here for you. That you may ask anything and you will receive the needed / correct answer. The easiest way to influence your employees positively is to be an example they would love to follow: do not be afraid to ask for help (we are all humans, we all need help sometimes with something, and this is normal), do not doodle from answering questions (even if tricky ones. Find a real response and operate with it). If you want something to be changed, be the first who not only is ready for a change but has already begun this brilliant process: take different tasks, enroll in different pieces of training and projects (why not along with your employees).
3. A constructive, positive, and empathic attitude towards your employees encourages them to express their ideas and visions freely, to communicate as openly as possible, without fear of making mistakes or being judged. They said people never leave jobs, they leave bosses or teams. So help your team be the one everyone dreams to become a part of. Steps to be taken: grow a collaborative work-culture (team responsibility — team decisions, brand bearers while participating in different non-work-related activities), cherish your team (praise concrete behavior, encourage employees individuality, create a context for creativity expressing).
The most important, but at the same time, the most beautiful way to make your employees happy is to understand everyone’s needs and mindsets. Knowing what drives every single employee, investing in his/her wellbeing, we will reach the win-win solution: a happy employee is a productive one, a productive one is a valuable one, a valuable one is the loyal one. Loyal employees are the treasure any respectable company deserves.
“… procrastination is a well-known process: we leave the tasks for the last moment, then we panic.”
Your deadline is here. But your task is not in progress, it is not even started yet. And you do not rush to do it. You may recheck a 10th time if you have a new message. You may remind yourself about a very interesting video that must be reseen at this very moment. You are hungry. You have to respond to an urgent call. Yes, you understand that you need to work. Also you, as a rational being, understand that you have to force yourself to start this task/activity. But it is simply impossible. Yes, procrastination is a well-known process. We leave the things we have to do for the last moment, then we panic. Do you remember the Panic Moster Ted talk? This habit destroys us, but what would be the solution? Here are some options:
This article is powered by Empy.io — an all-in-one tool that helps HRs synchronize with the employees and handle all the internal requests in one single place. Try it for free!
1. Divide everything you need into small pieces. They say it is impossible to eat an elephant, but it could be done by breaking it into small pieces. One of the causes of procrastination is the understanding, on a subconscious level, of the excessive volume of the task. Focusing on small things we will be willing to quickly finish what we set out.
2. Change the work environment. Different environments have different impacts on our productivity. Choose where it is easier for you to do a certain activity.
3. Draw up a calendar and set deadlines for every particular activity. Having a single deadline for all activities is like an invitation to procrastinate.
4. Eliminate distracting factors. One of the reasons for procrastination is the availability of other occupations, so limit your access to what distracts you. Put the phone on silent, close all tabs where you do not work, do not leave any opportunity to escape!
5. Communicate with people who inspire you to action. The people in our entourage directly influence our behavior. By interacting with other people, each of us takes something from the interlocutor.
6. Clarify your goal. Maybe the cause of procrastination is the discrepancy between what you want to achieve and what you do. It happens that during our journey in reaching the goal, we grow and we already have other desires and needs. Instead of wasting time, take a break and decide what you really want to achieve.
7. Don’t complicate things. Are you waiting for a perfect time to start? Now is not the right time to start because x, y, z? Here’s a secret — the perfect moment will never be or is right now, you choose!
Several years ago we at FusionWorks launched our awesome tool for 360° photographers — Viar.Live. Its goal was to offer an easy-to-use tool for creating virtual tours from 360° photos. Viar.Live was warmly accepted by the users and we got a lot of positive feedback, but one email really surprised us: we were approached by Wix with the suggestion of joining their app market with our application, which we eagerly accepted. The journey was not easy since Wix has a lot of specific requirements with which we had to comply, but finally we made it through and now it’s time to present the results.
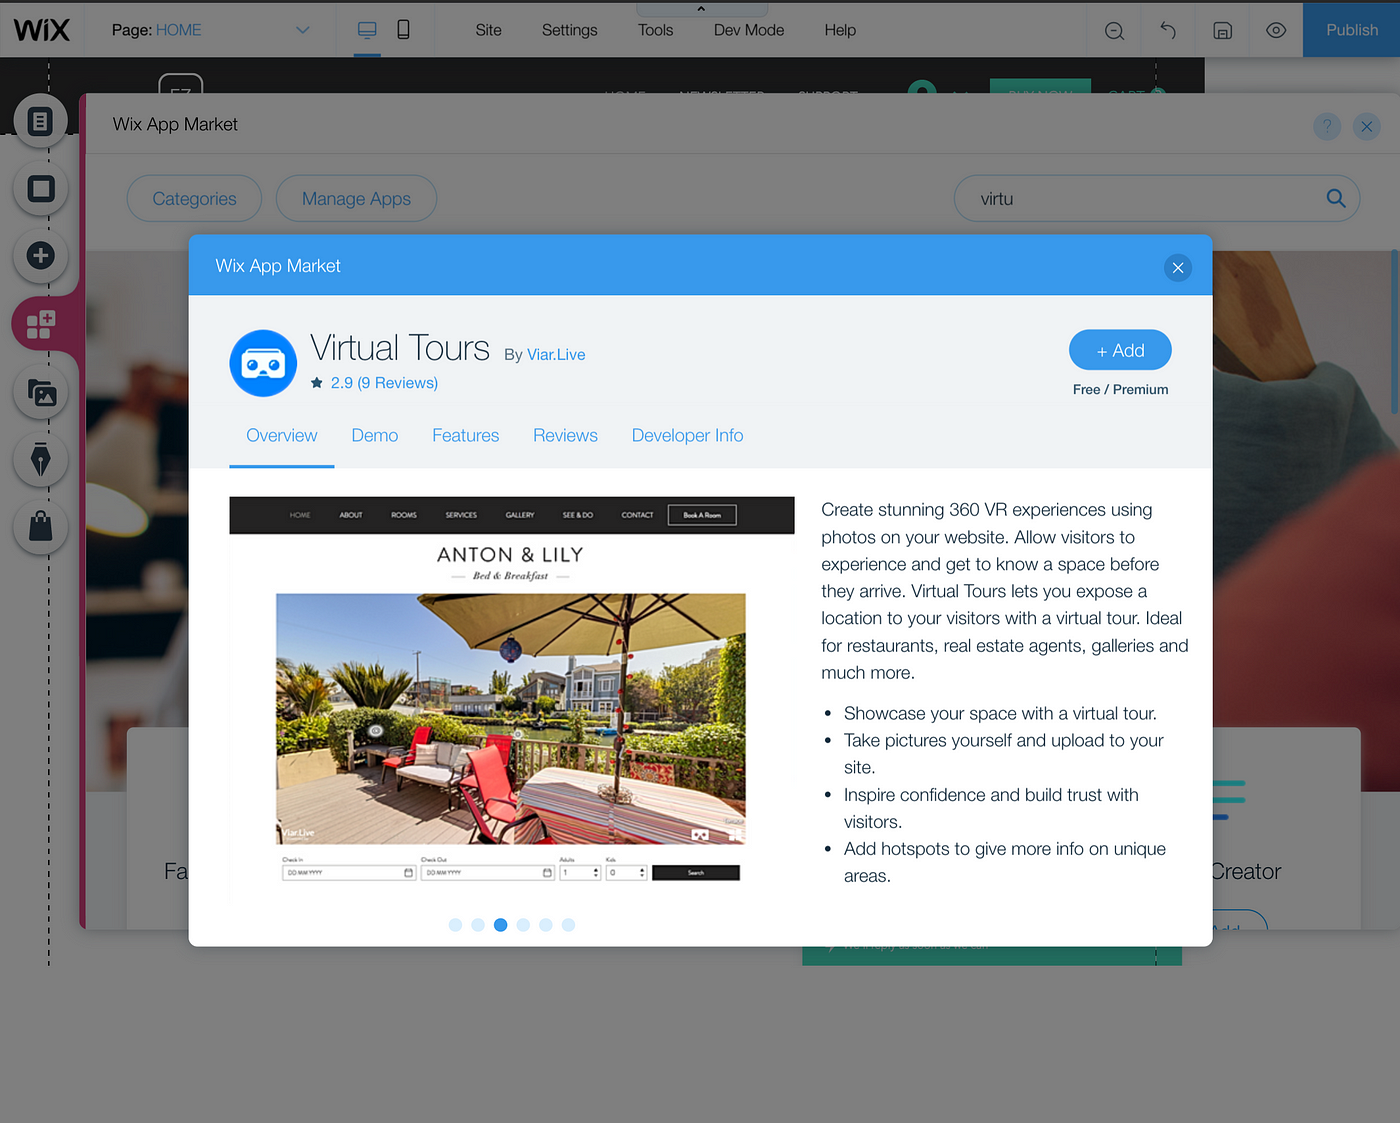
Finding the Virtual Tours app on the market place
Just type “Virtual” in the Wix App Market or follow this link and add our app to your website.
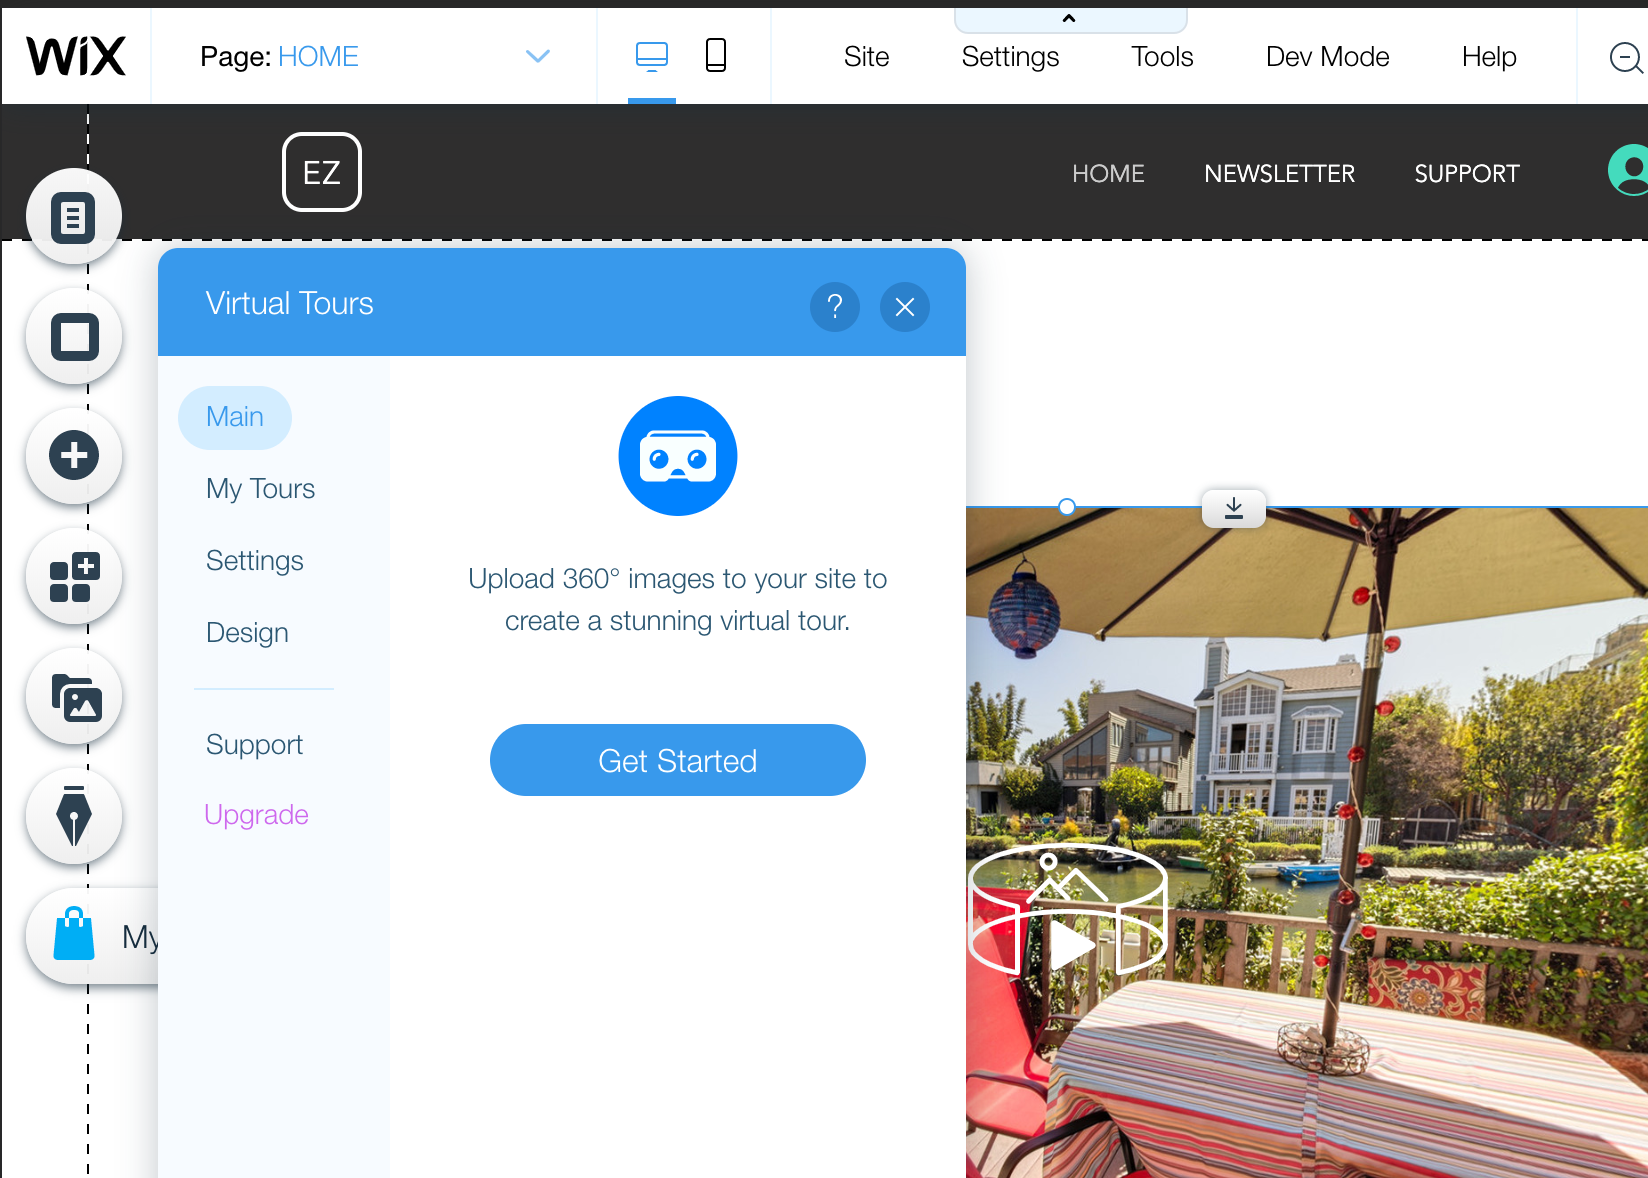
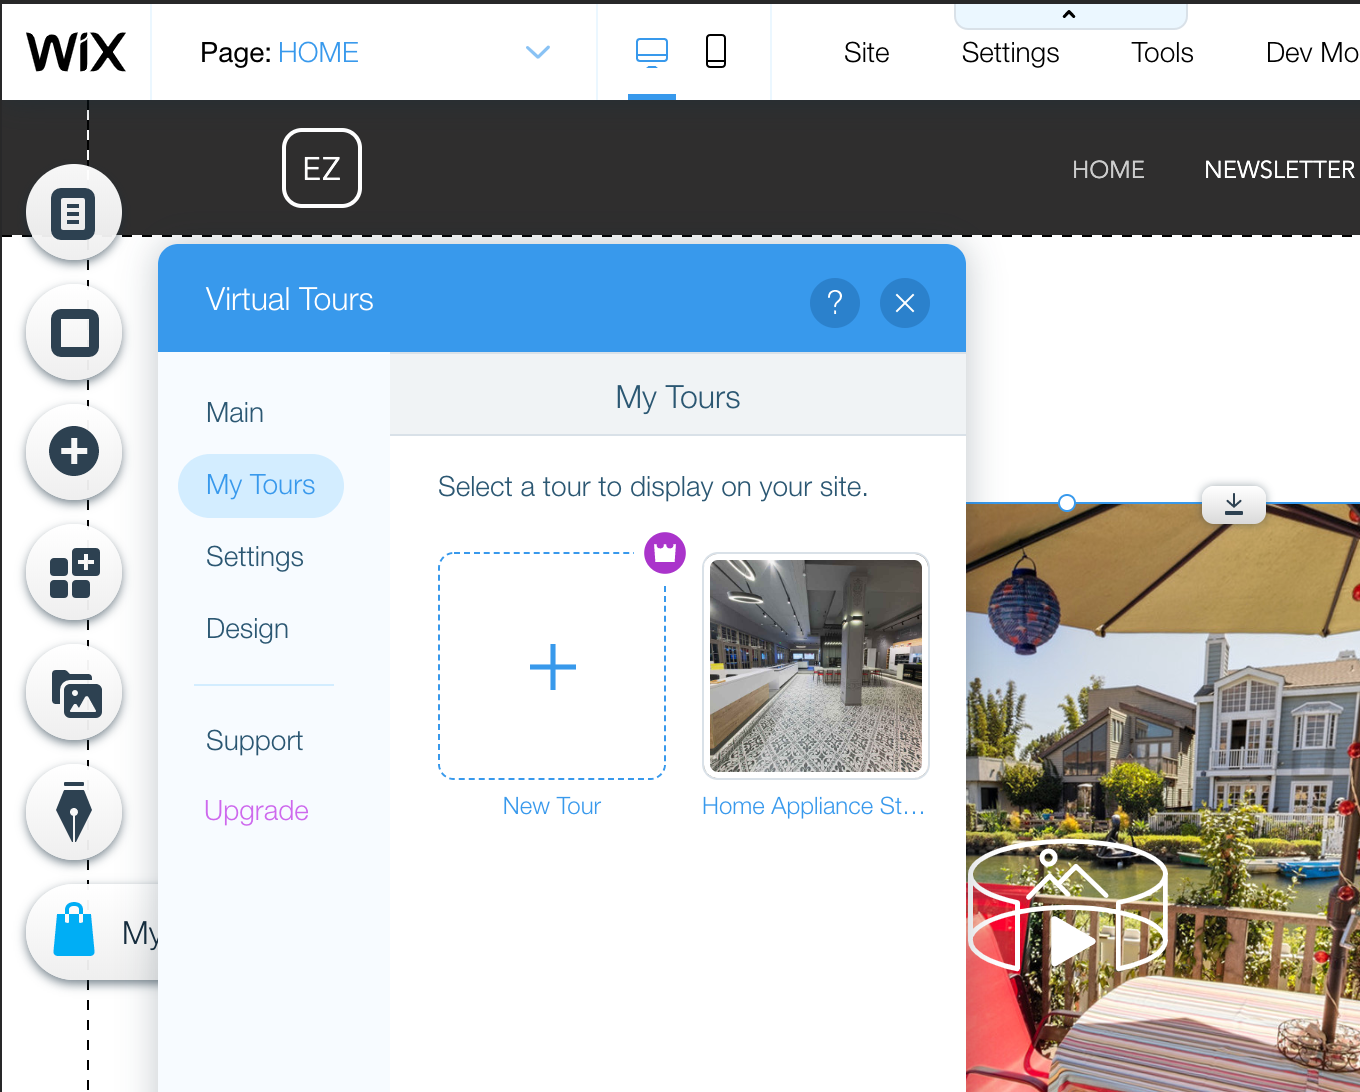
Creating your first tour
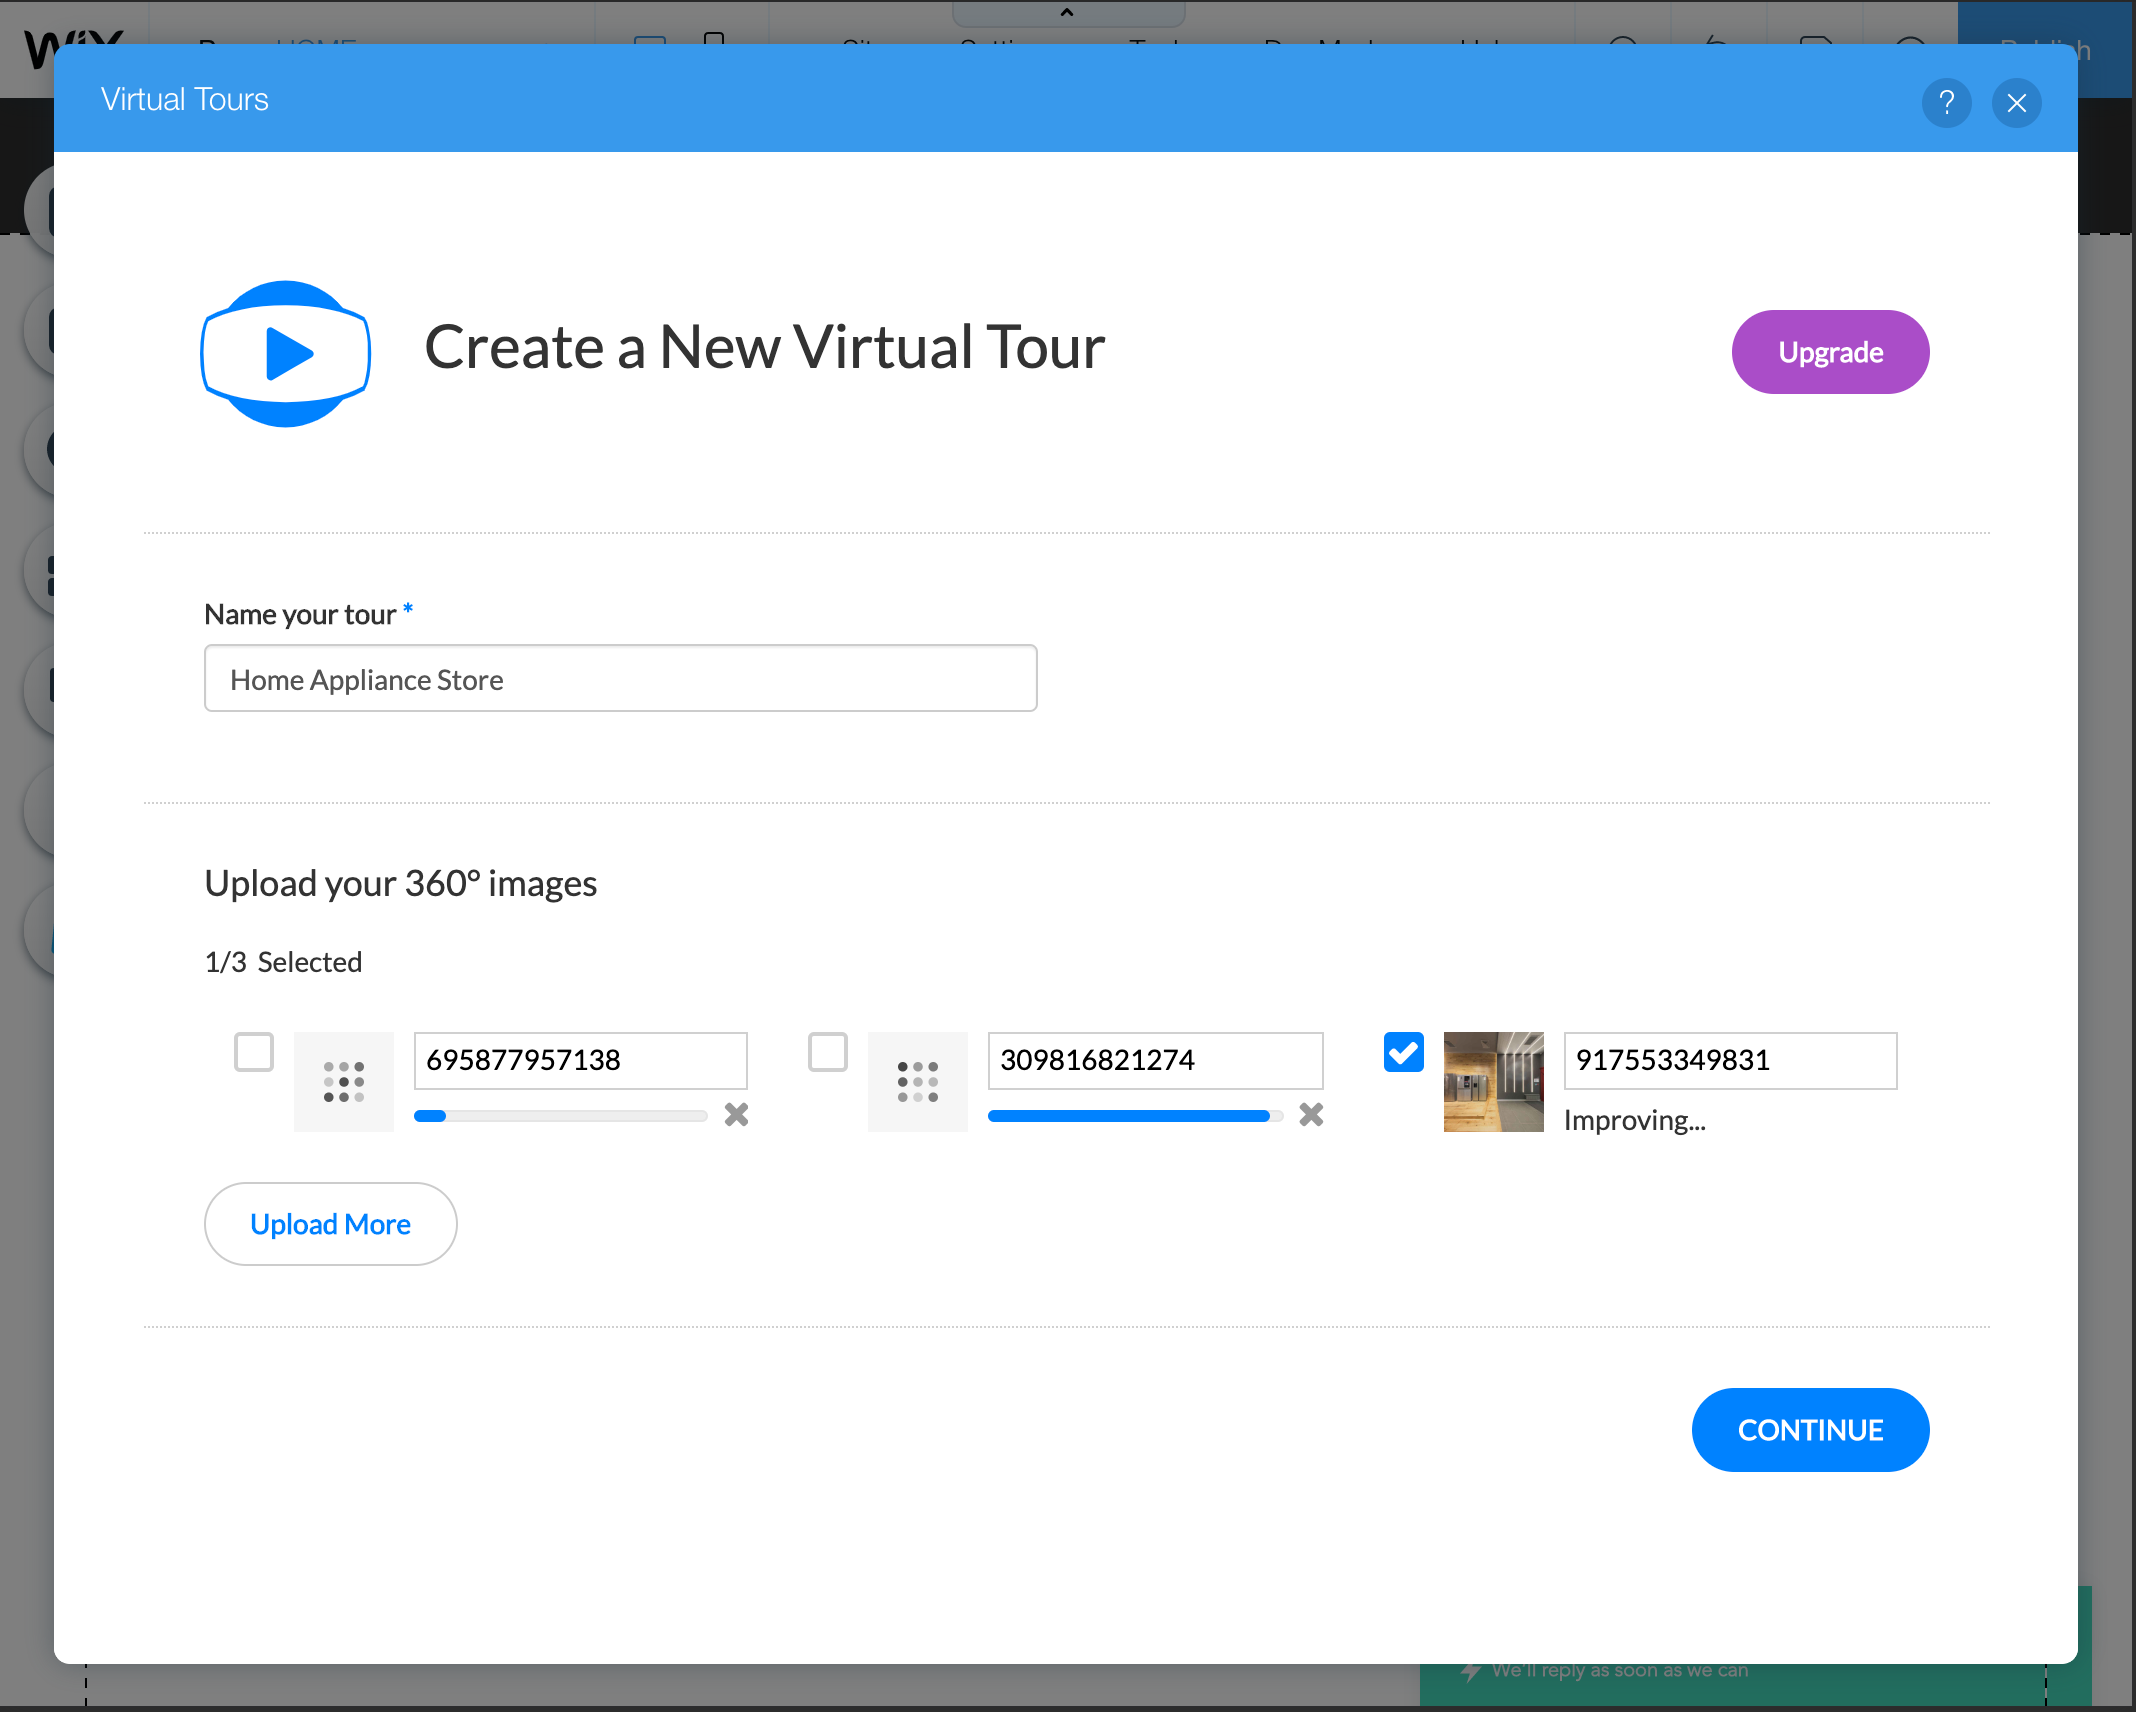
To create a tour you don’t need to specifically create a 360° photo — any panorama made on your smartphone will work. Just click “Get Started” in the application settings and upload your photos.
Once the uploading and processing are over, click “Continue” to proceed to the tour editor. Once in it, start connecting panoramas by dragging thumbnails into appropriate connection places.
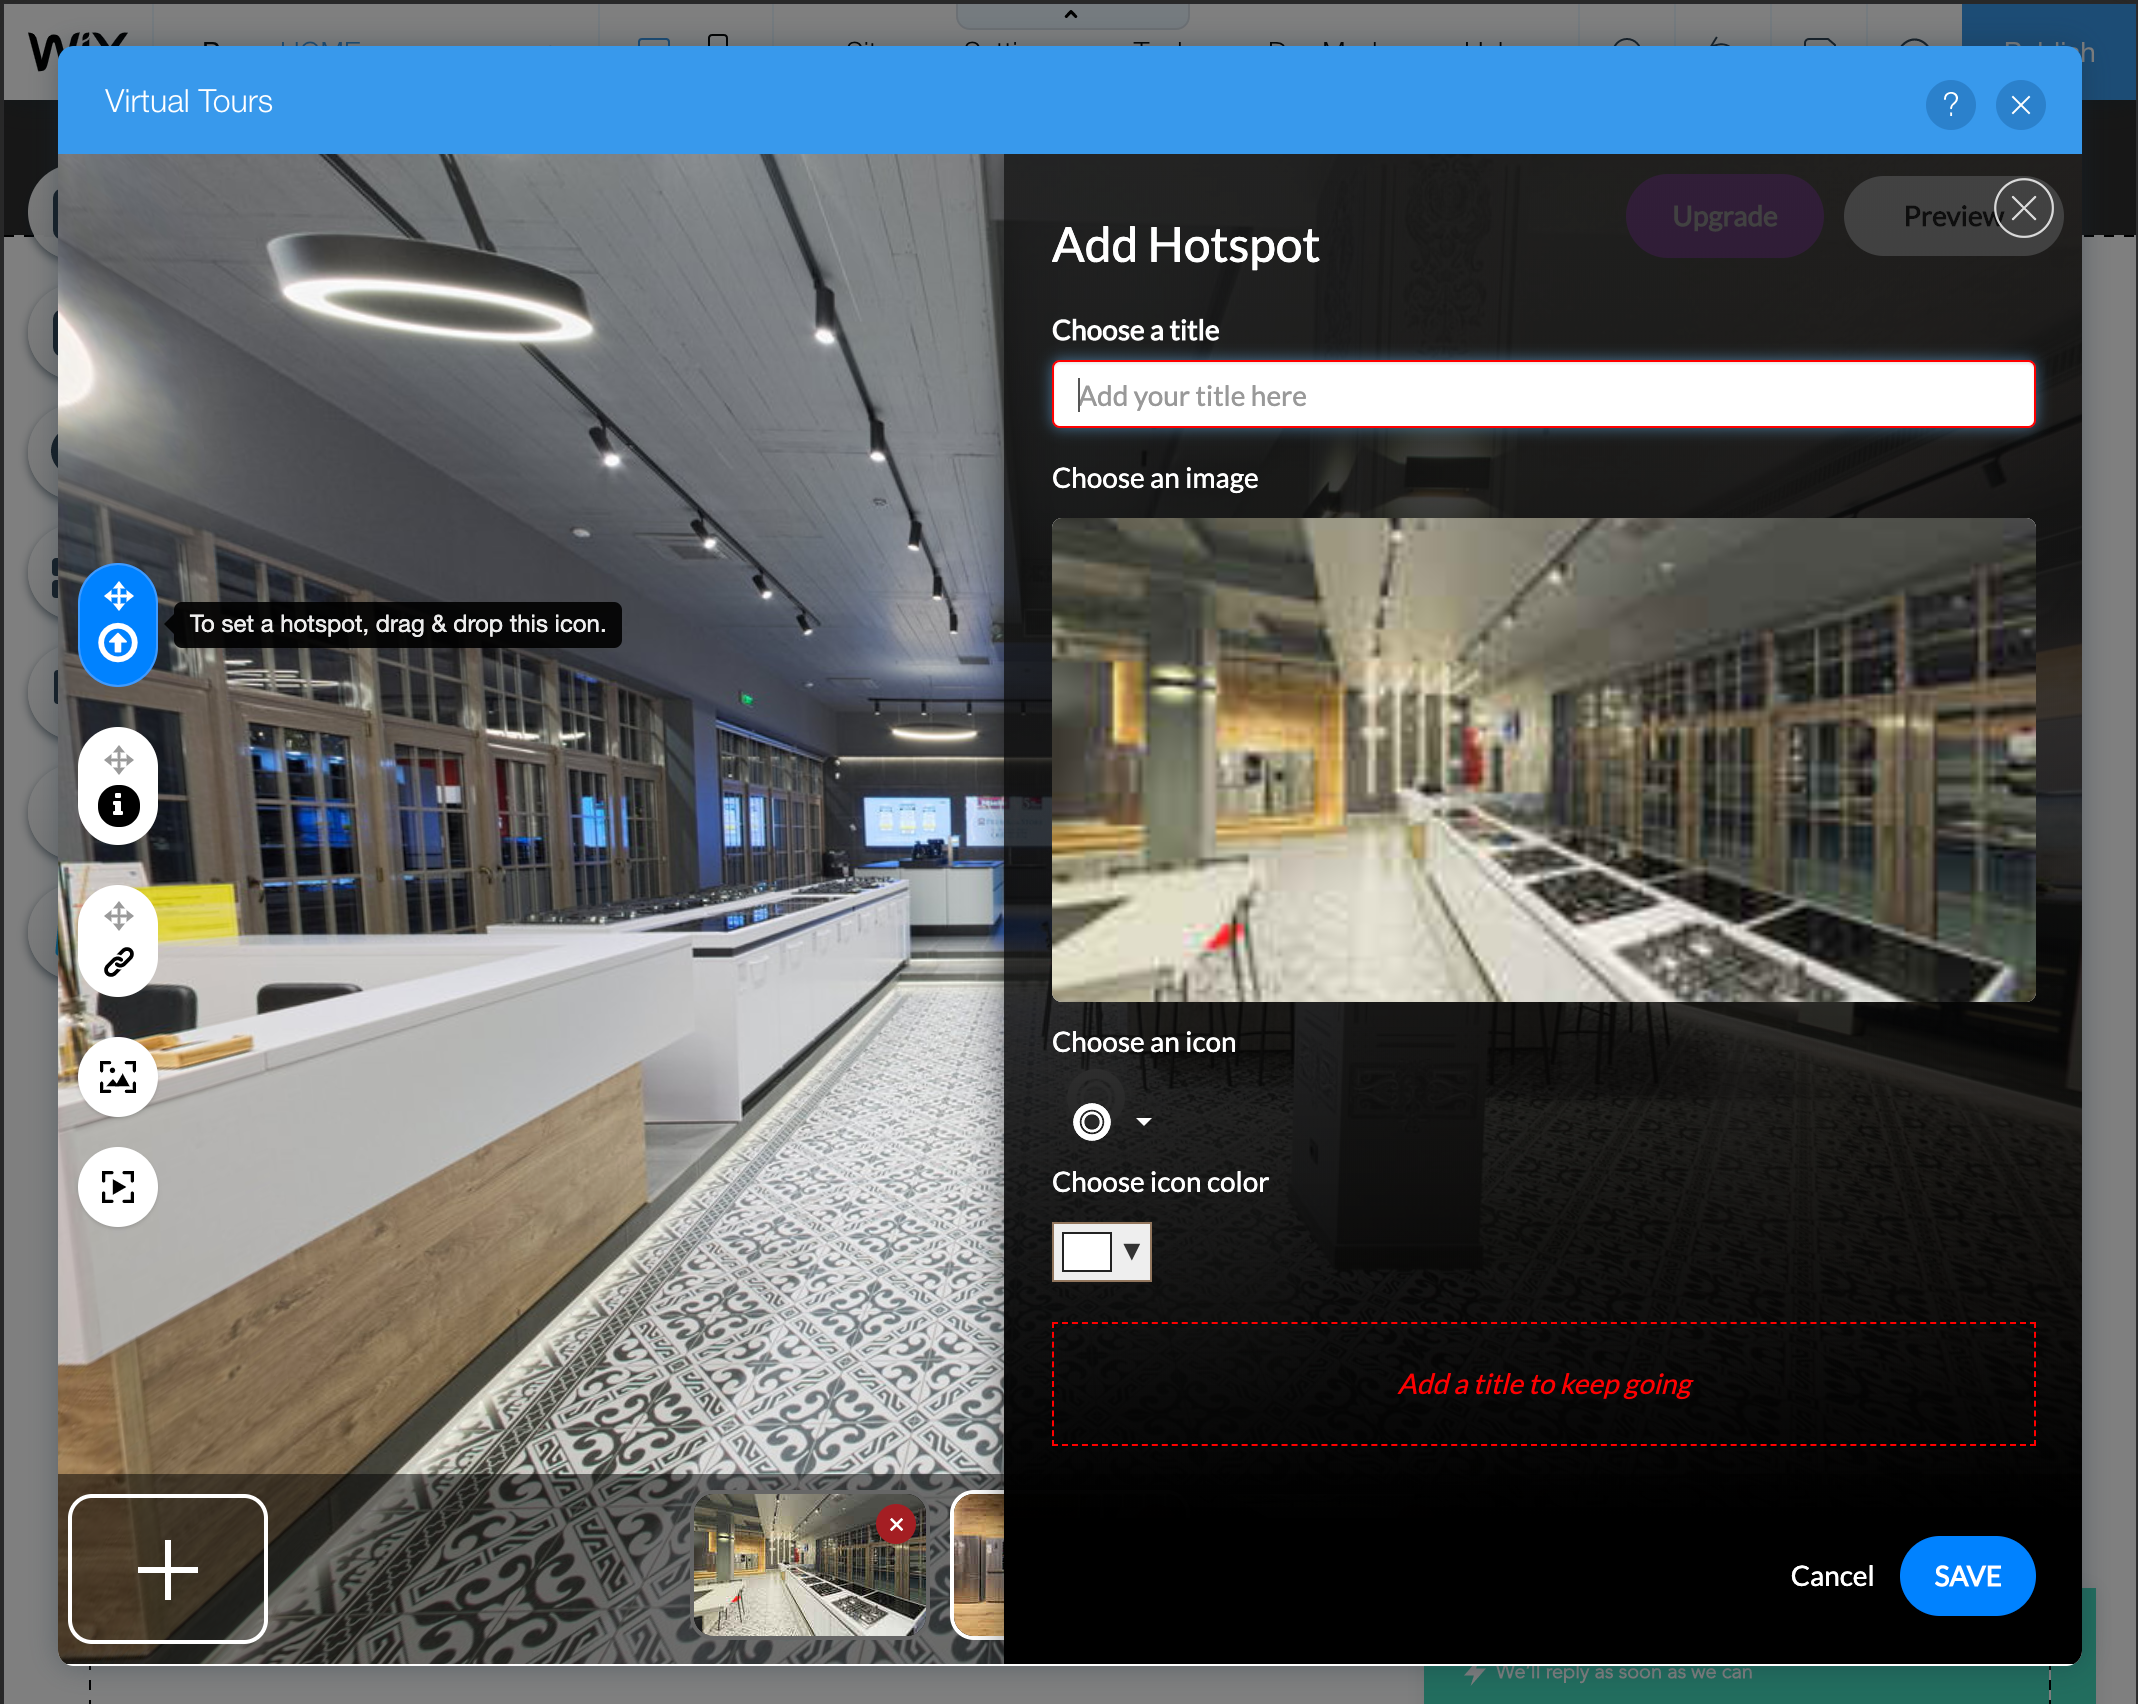
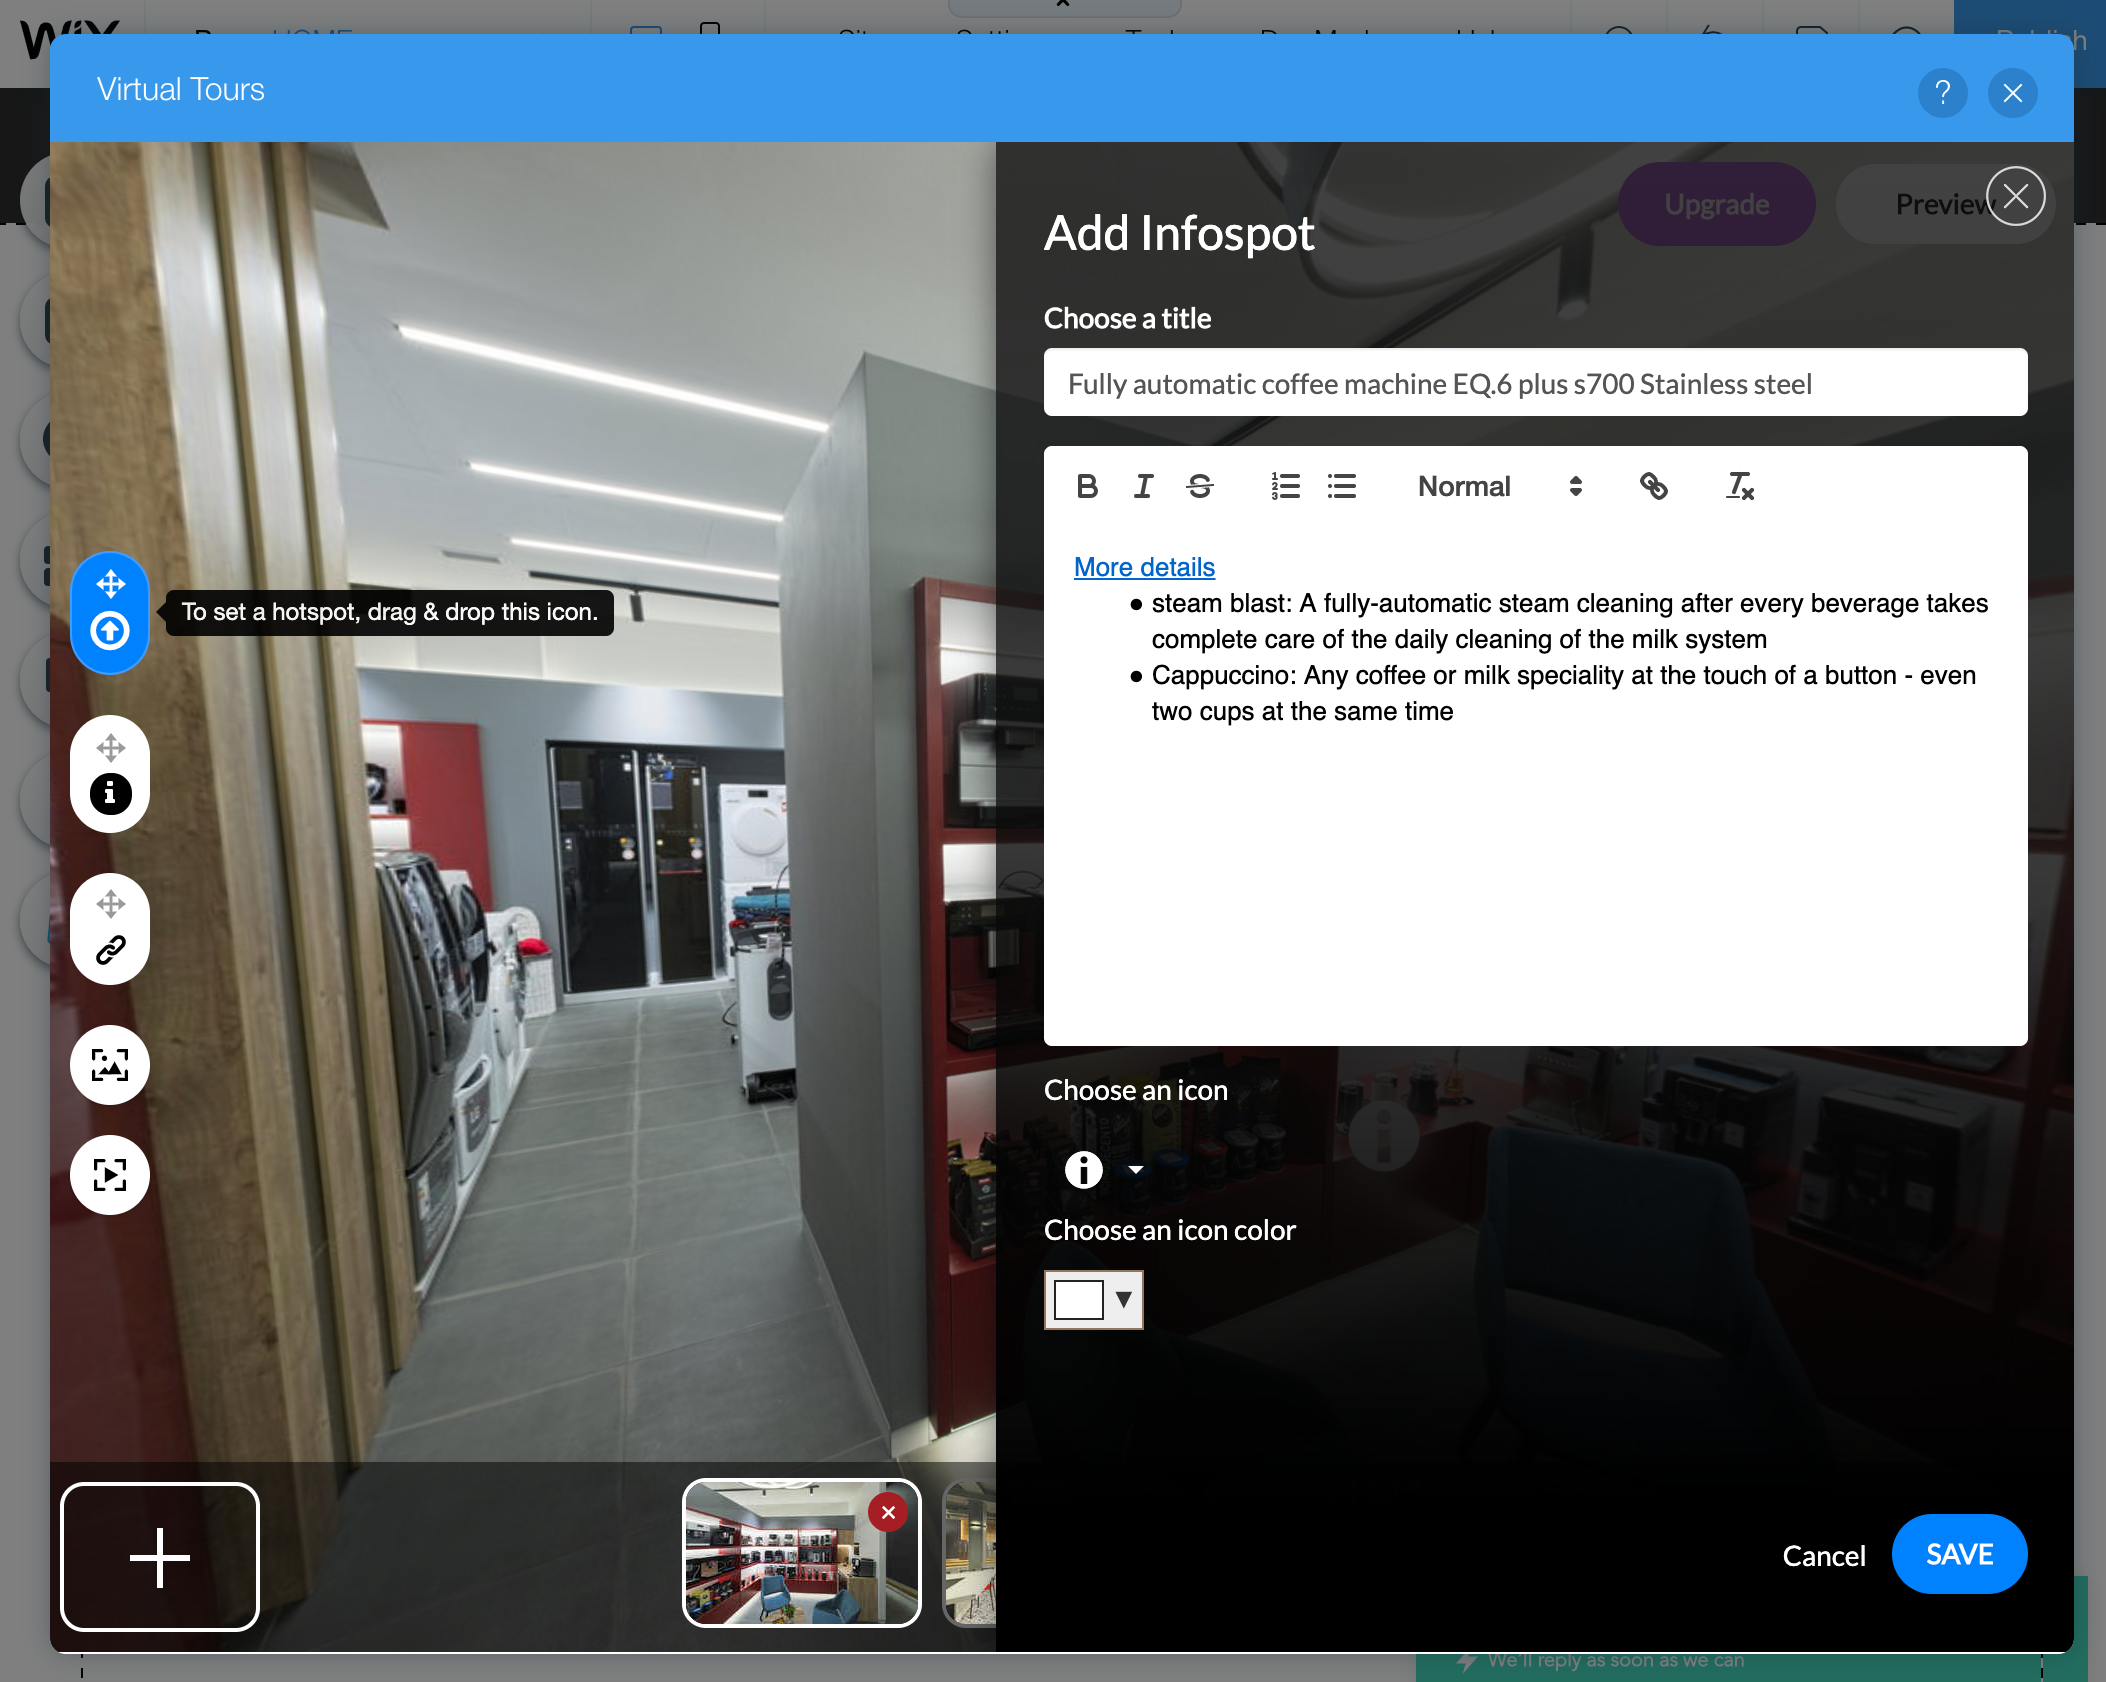
Besides connection points, you can also add link and information hotspots.
Once finished, just assign a newly created tour to the Virtual Tours widget and share your website!
In the first part, we showed how React Admin and NestJS can work together to quickly create a simple admin panel.
In this part, we will go a little bit beyond basic CRUD and cover the following topics:
Handling one-to-many relationships
Handling file uploads to Amazon S3
Using the Google Maps input
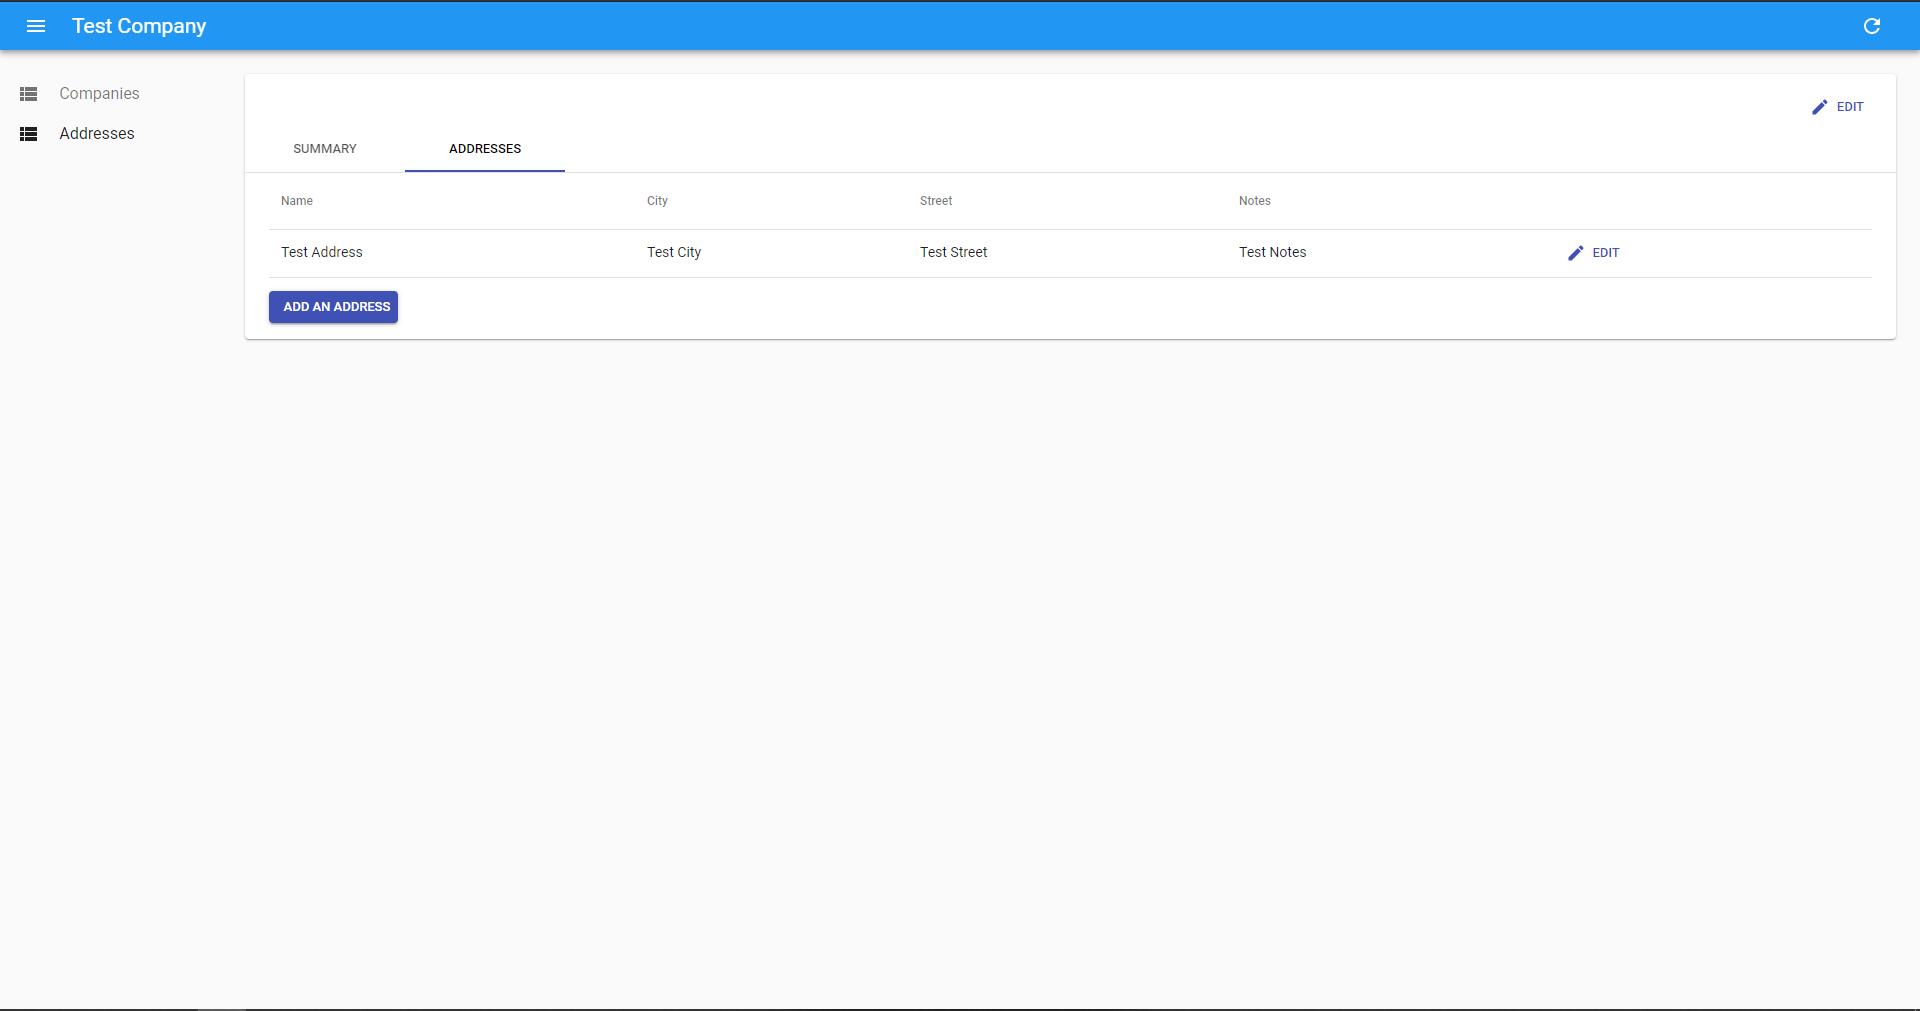
Handling one-to-many relationships
To showcase this (and other points), we will change the domain model of our application. So instead of a guest list, we will manage companies and their addresses.
This will require the following entities and controllers to added to our API:
Company Entity with a declared relationship with Address Entity:
And finally, add an “Add address” button which will open the create address form:
import React from 'react';
import { Link } from 'react-router-dom';
import { withStyles } from '@material-ui/core/styles';
import { Button } from 'react-admin';const styles = {
button: {
marginTop: '1em',
},
};const AddAddressButton = ({ classes, record }) => (
<Button
className={classes.button}
variant="raised"
component={Link}
to={`/address/create?companyId=${record.id}`}
label="Add an address"
title="Add an address"
/>
);export default withStyles(styles)(AddAddressButton);
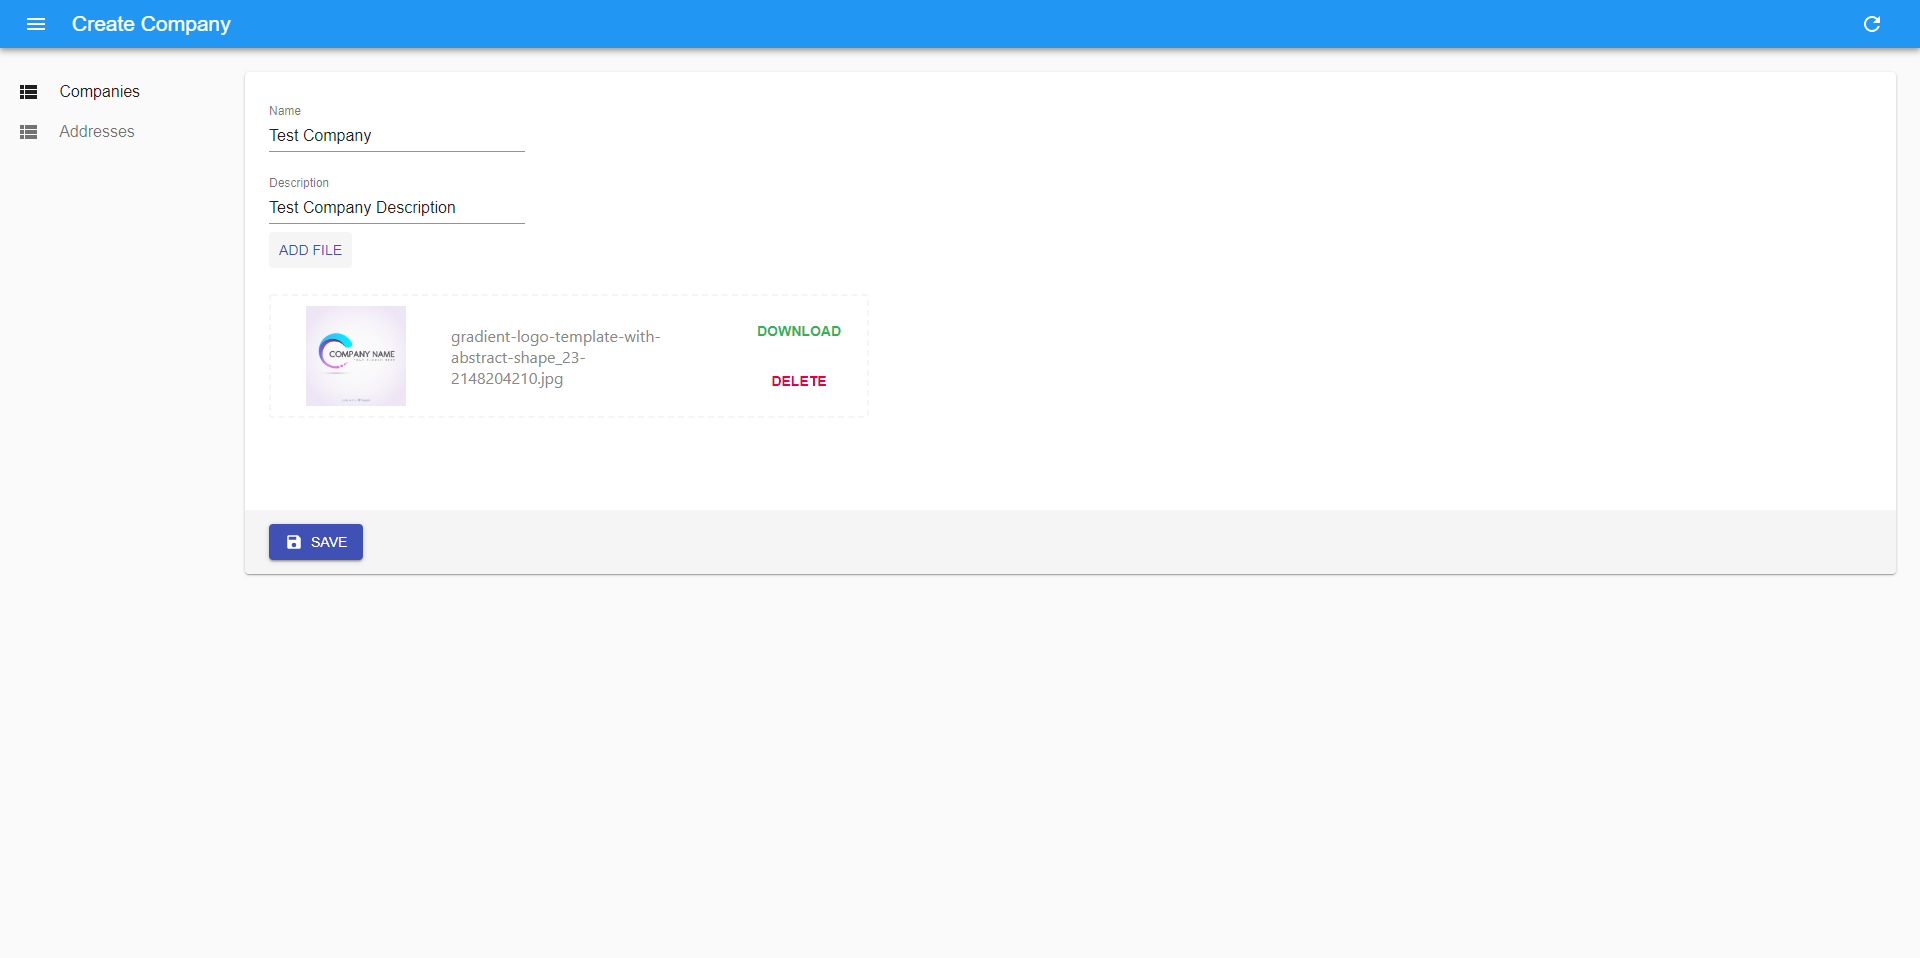
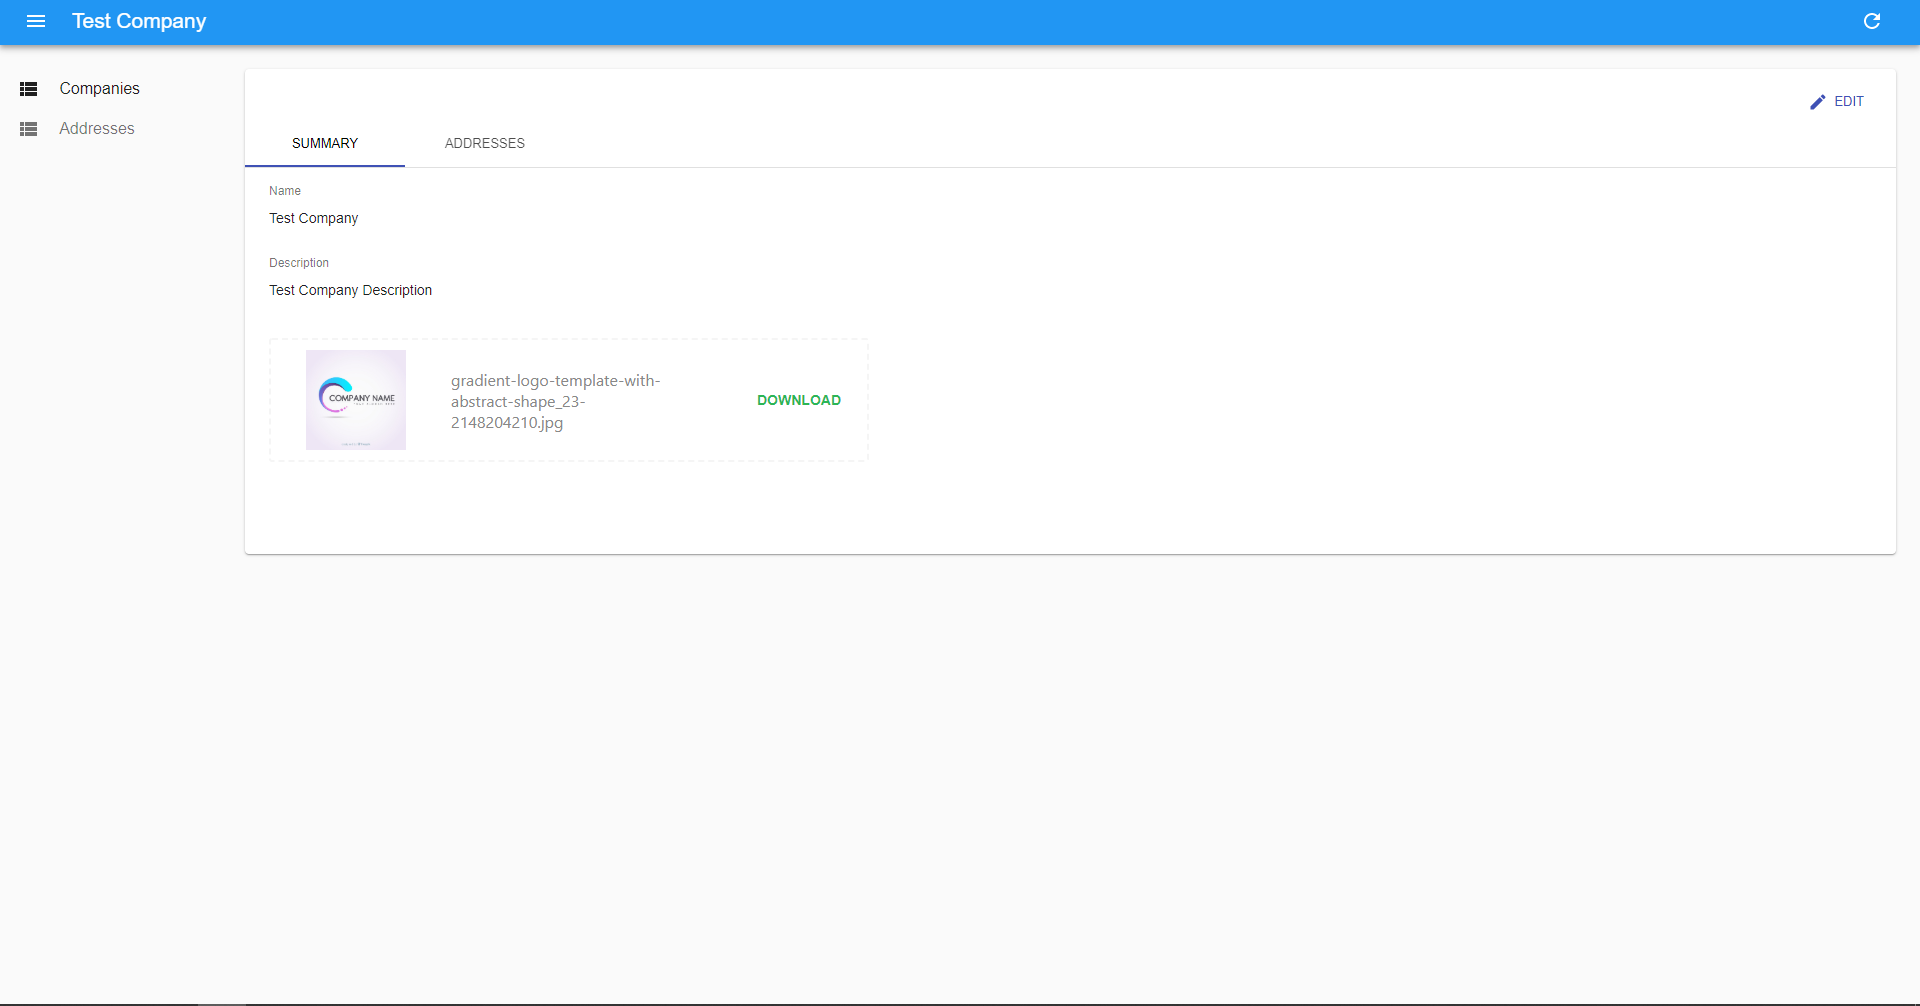
Handling file uploads to Amazon S3
Let’s say we would like to add some photos to our company record. We will store them on Amazon S3. To handle it from the UI perspective, we created a custom React Admin input — https://github.com/FusionWorks/react-admin-s3-file-upload/. Here is how it should be added to our application:
To make this component work, we will need some support from the API side for signing AWS API requests. Let’s add the required components to our NestJS-based backend.
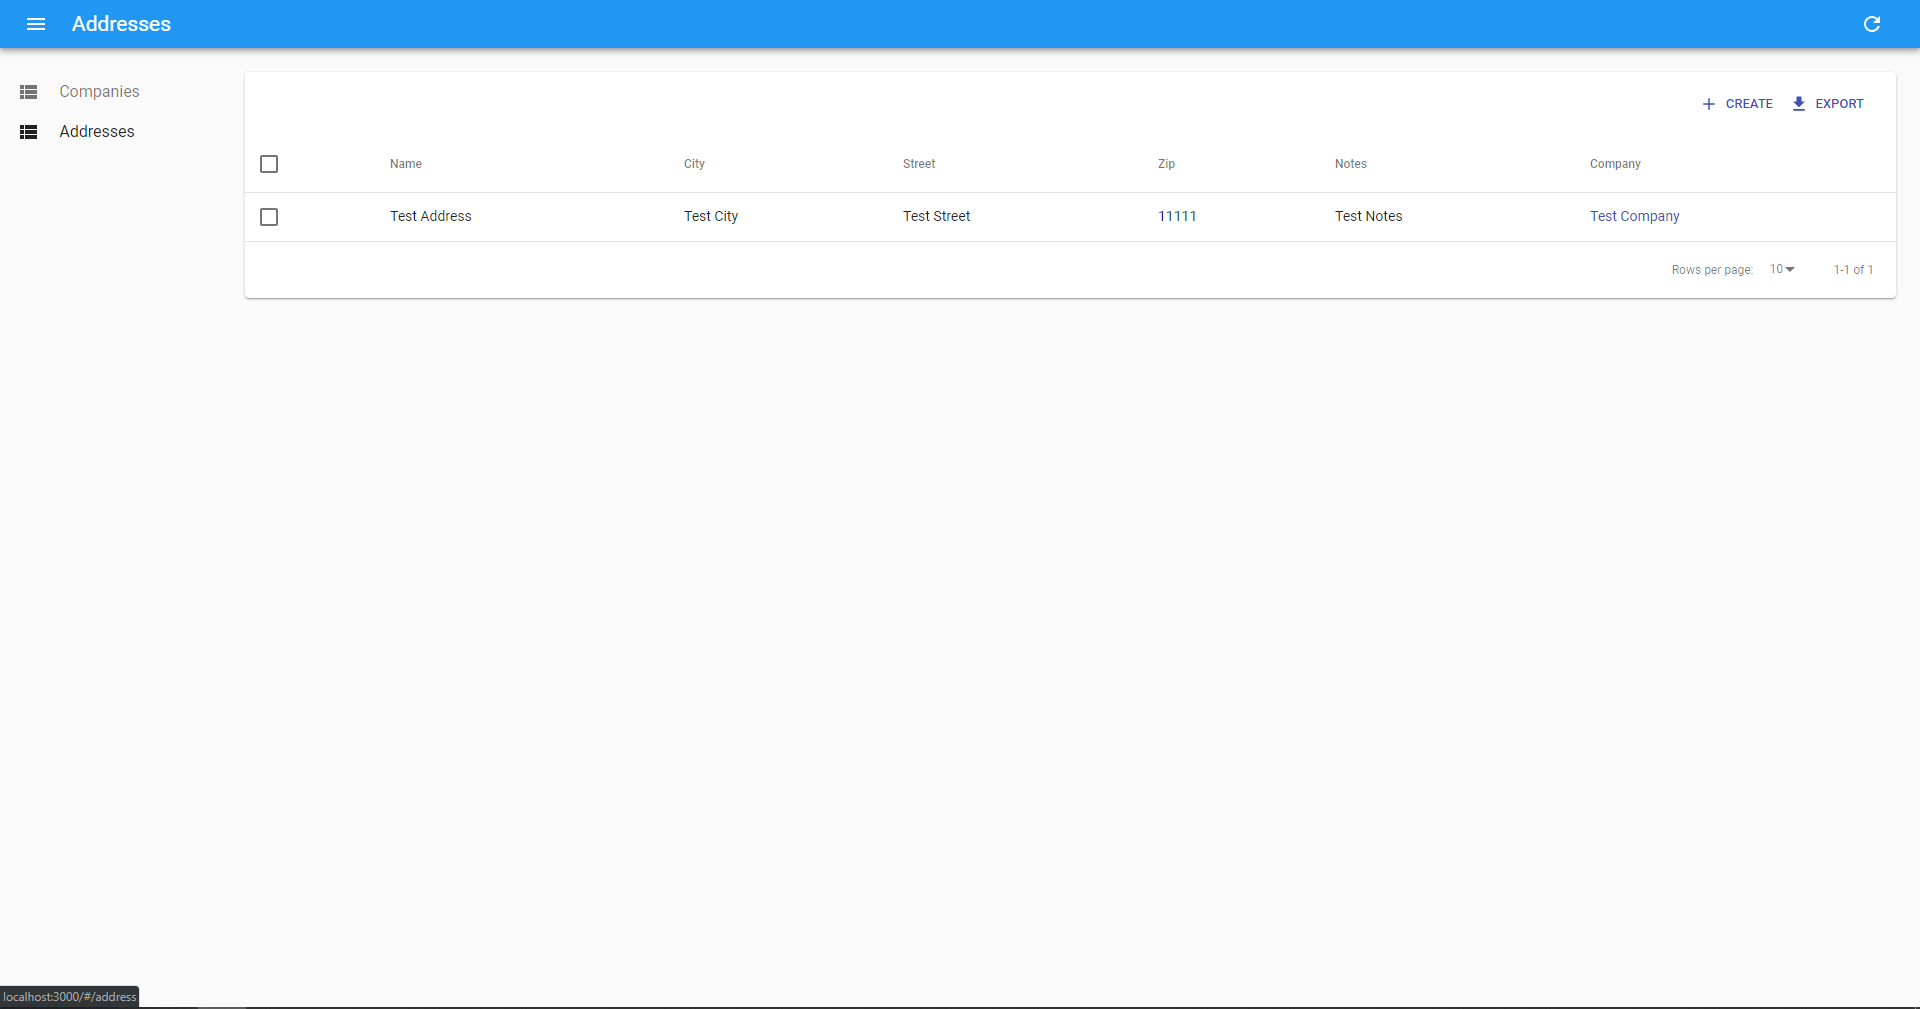
Sometimes we need to associate some location on the map with one of our entities. For this purpose, we created a Google Maps input —https://github.com/FusionWorks/react-admin-google-maps. To use it we will need to update our Address Entity. We will store the pointer on the map like a JSON object in the JSON column in our DB.
And run our frontend part with react-admin from “admin-ui” folder:
yarn start
Conclusion
In this article, we touched on the relationship between entities, but there are many more topics that have not been addressed but will be described in the future. I will cover them in the next articles and we’ll see if this stack survives nicely. So stay tuned to the FusionWorks:
If you work hard and spend a lot of time on an elementary task, it does not mean that you are productive. Firstly let’s try to analyze what productivity is.
Productivity is commonly defined as a ratio between the output volume and the volume of inputs. Or, the rapport between completed tasks and the time spent while completing them. Employee productivity (sometimes referred to as workforce productivity) is an assessment of the efficiency of a worker or group of workers. Typically, the productivity of a given worker will be assessed relative to an average for other employees doing similar work.
Now, when we have an idea of the productivity concept we may think about the ways to improve it. Try the following and you will definitely increase efficiency! Let’s start working smarter instead of harder:
This article is powered by Empy.io — an all-in-one tool that helps HRs synchronize with the employees and handle all the internal requests in one single place. Try it for free!
1) Finish planning. Start acting.
It’s good to take the time to plan your actions, but you can waste too many hours just planning. Check what you have to do and don’t wait, start! If you count tens of thousands of times the activities you have to undertake, you gain nothing. Avoid friendship with procrastination, break with it! You can do it. Start the activity. A small step is still a move forward.
2) Meetings can last a maximum of 30 minutes.
Are all the meetings so important? Who counted how many hours a week he/she spends for: on the way to/from the meeting, unimportant discussions, boring people? If you have what to skip, do it. But if you are sure of the importance of all meetings, drop them on time. Half an hour is the perfect time to find out the latest news, decide and go on happily.
3) Say YES only to the important things.
Someone said that the difference between a successful man/woman and a very successful one is the ability to say NO. Every time we agree to do something for another person, we waste our time on activities that have absolutely nothing to do with our mission and goals. As a result, we are unhappy. We have not achieved anything important. We are tired — half a day has passed for nothing. And we are depressed — we do not find meaning in what we do. We can achieve more if we only get involved in what matters, we know exactly what we do when we do it and why we do it.
4) Free your mind.
Our brains are overworked. We bombard them with all kinds of information and more and more voluminous. Why do we remember what we only need for a very short time? Why were all kinds of diaries invented? When we want our computer/phone to work faster, we get out of all sorts of unnecessary applications, as well the mind works. Everything we can write — meetings, classes, topics for discussion, questions, etc. — write down instead of trying to memorize.
IT is always about communities. Such was my thinking in the far year of 2011 when I created the first Moldovan IT community on Facebook — DeveloperMD. After a half-year of online activity we decided that we have to get together offline. Said and done: in September 2011 we had the first DeveloperMD Community Offline with approximately 40 participants. One week later me and my partner created a software development company — FusionWorks — this was inspired by the outcome of the first event. Already in November, now having FusionWorks as the main partner, we’ve organized the 2nd edition. At some point, due to the growing size of the event, we realized that it should be done once a year and eventually we had 11 editions so far. In 2018 the big change took place — event was extended to two days, the name was changed to Moldova Developer Conference and another, much bigger venue, was selected. This led to the increase of number of participants — 350 — which makes MDC the biggest IT conference for developers in the country. This year #MDC19 is planned for November 2–3 and we expect around 450 awesome people to attend. So let me tell you more about what is going to happen in 2019.
Why #MDC19 is cool
Well, let’s count:
It’s the biggest IT event for developers in the country.
It has thoroughly selected content (speakers pass through a selection process and are trained by professionals).
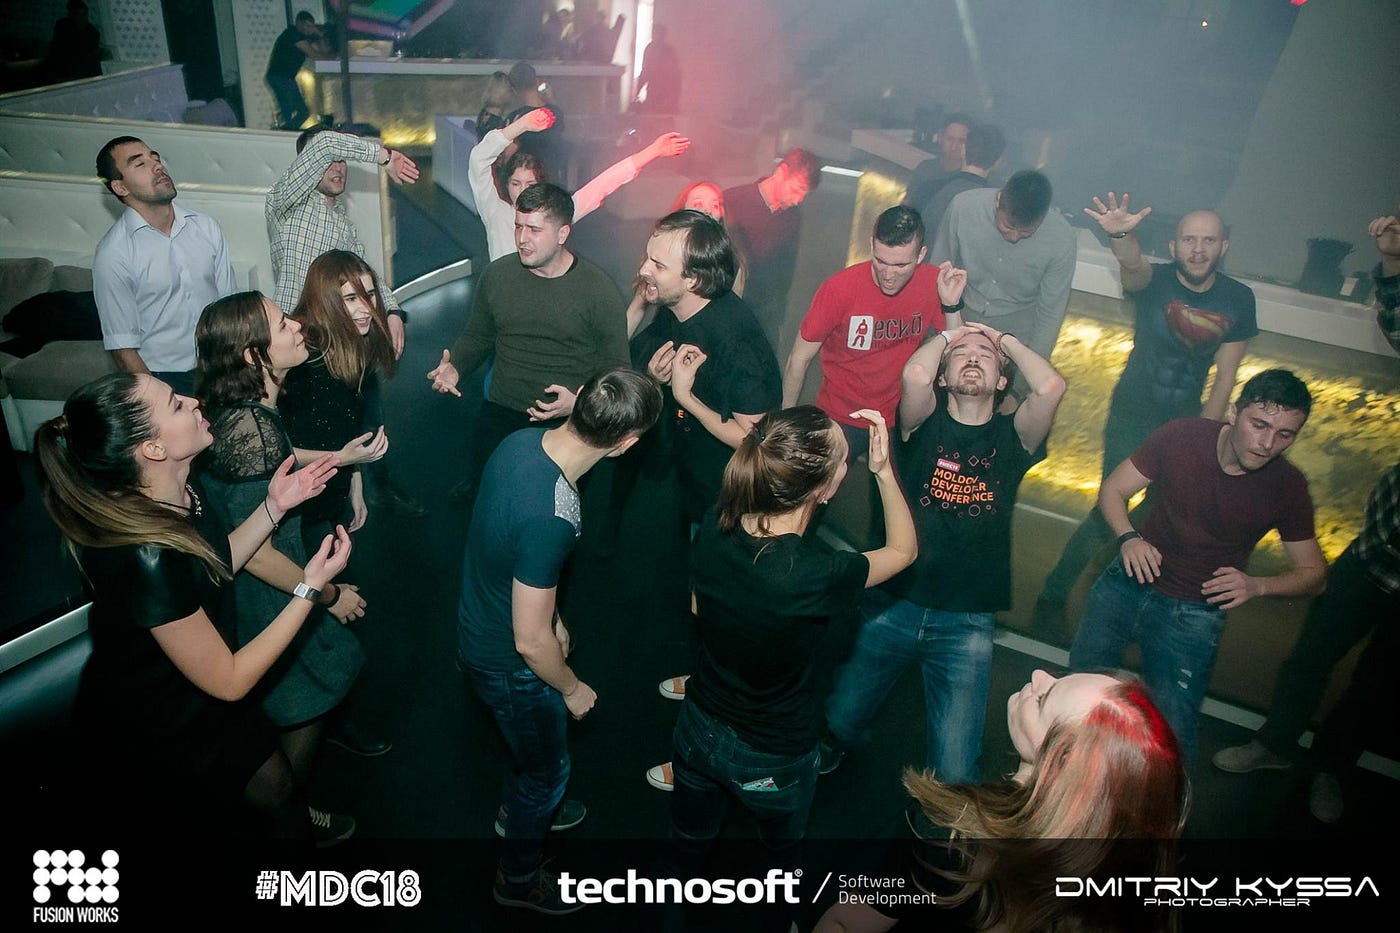
Each conference day is followed by amazing afterparty or wine tasting event (yep, Moldova is about wine and IT — not sure which one comes first).
Sometimes people ask: “Why are you doing this?”. The answer simple — we do it because we can. And because we love it! Having hundreds of bright eyes before you is the pleasure that can’t be denied. So we started in 2011 and are not going to stop.
Ok, let’s now learn more about the host country — Moldova — this small IT valley.
Top 3 facts about Moldova
Moldova is not Maldives. Often mail delivery companies send parcels to the wrong country. Moldova has around 3.5 millions inhabitants and used to be USSR country until 1991. Official language is Romanian/Moldovan (the same language but is called differently in official documents). Also people understand and speak Russian here. Most of IT geeks speak English fluently, taxi drivers — not.
Moldova has a very attractive IT sector — companies pay unique 7% tax that transforms BRUT into NET. IT sector capacity is about 10 000 specialists. Most of the companies are outsourcing ones and offer very attractive rates.
The highest peak in Moldova is 428 meters high and the author of this article has never climbed that hill. Despite the fact that he has been to Everest BC, Kilimanjaro, Elbrus, Kazbek, Mitikas/Olimp and many others.
See you in the most promising IT country in Europe!
In this series of articles, I will describe how to quickly bootstrap an API-based administration panel for your project using NestJS and React Admin.
In order to proceed further (in casу you are not reading just for fun), you may need to have NodeJS 10+, npm, yarn and MySQL installed on your computer. Also, you should have some basic knowledge of TypeScript and React.
Our project will consist of 2 part:
REST API, written in TypeScript
Admin panel, written in React
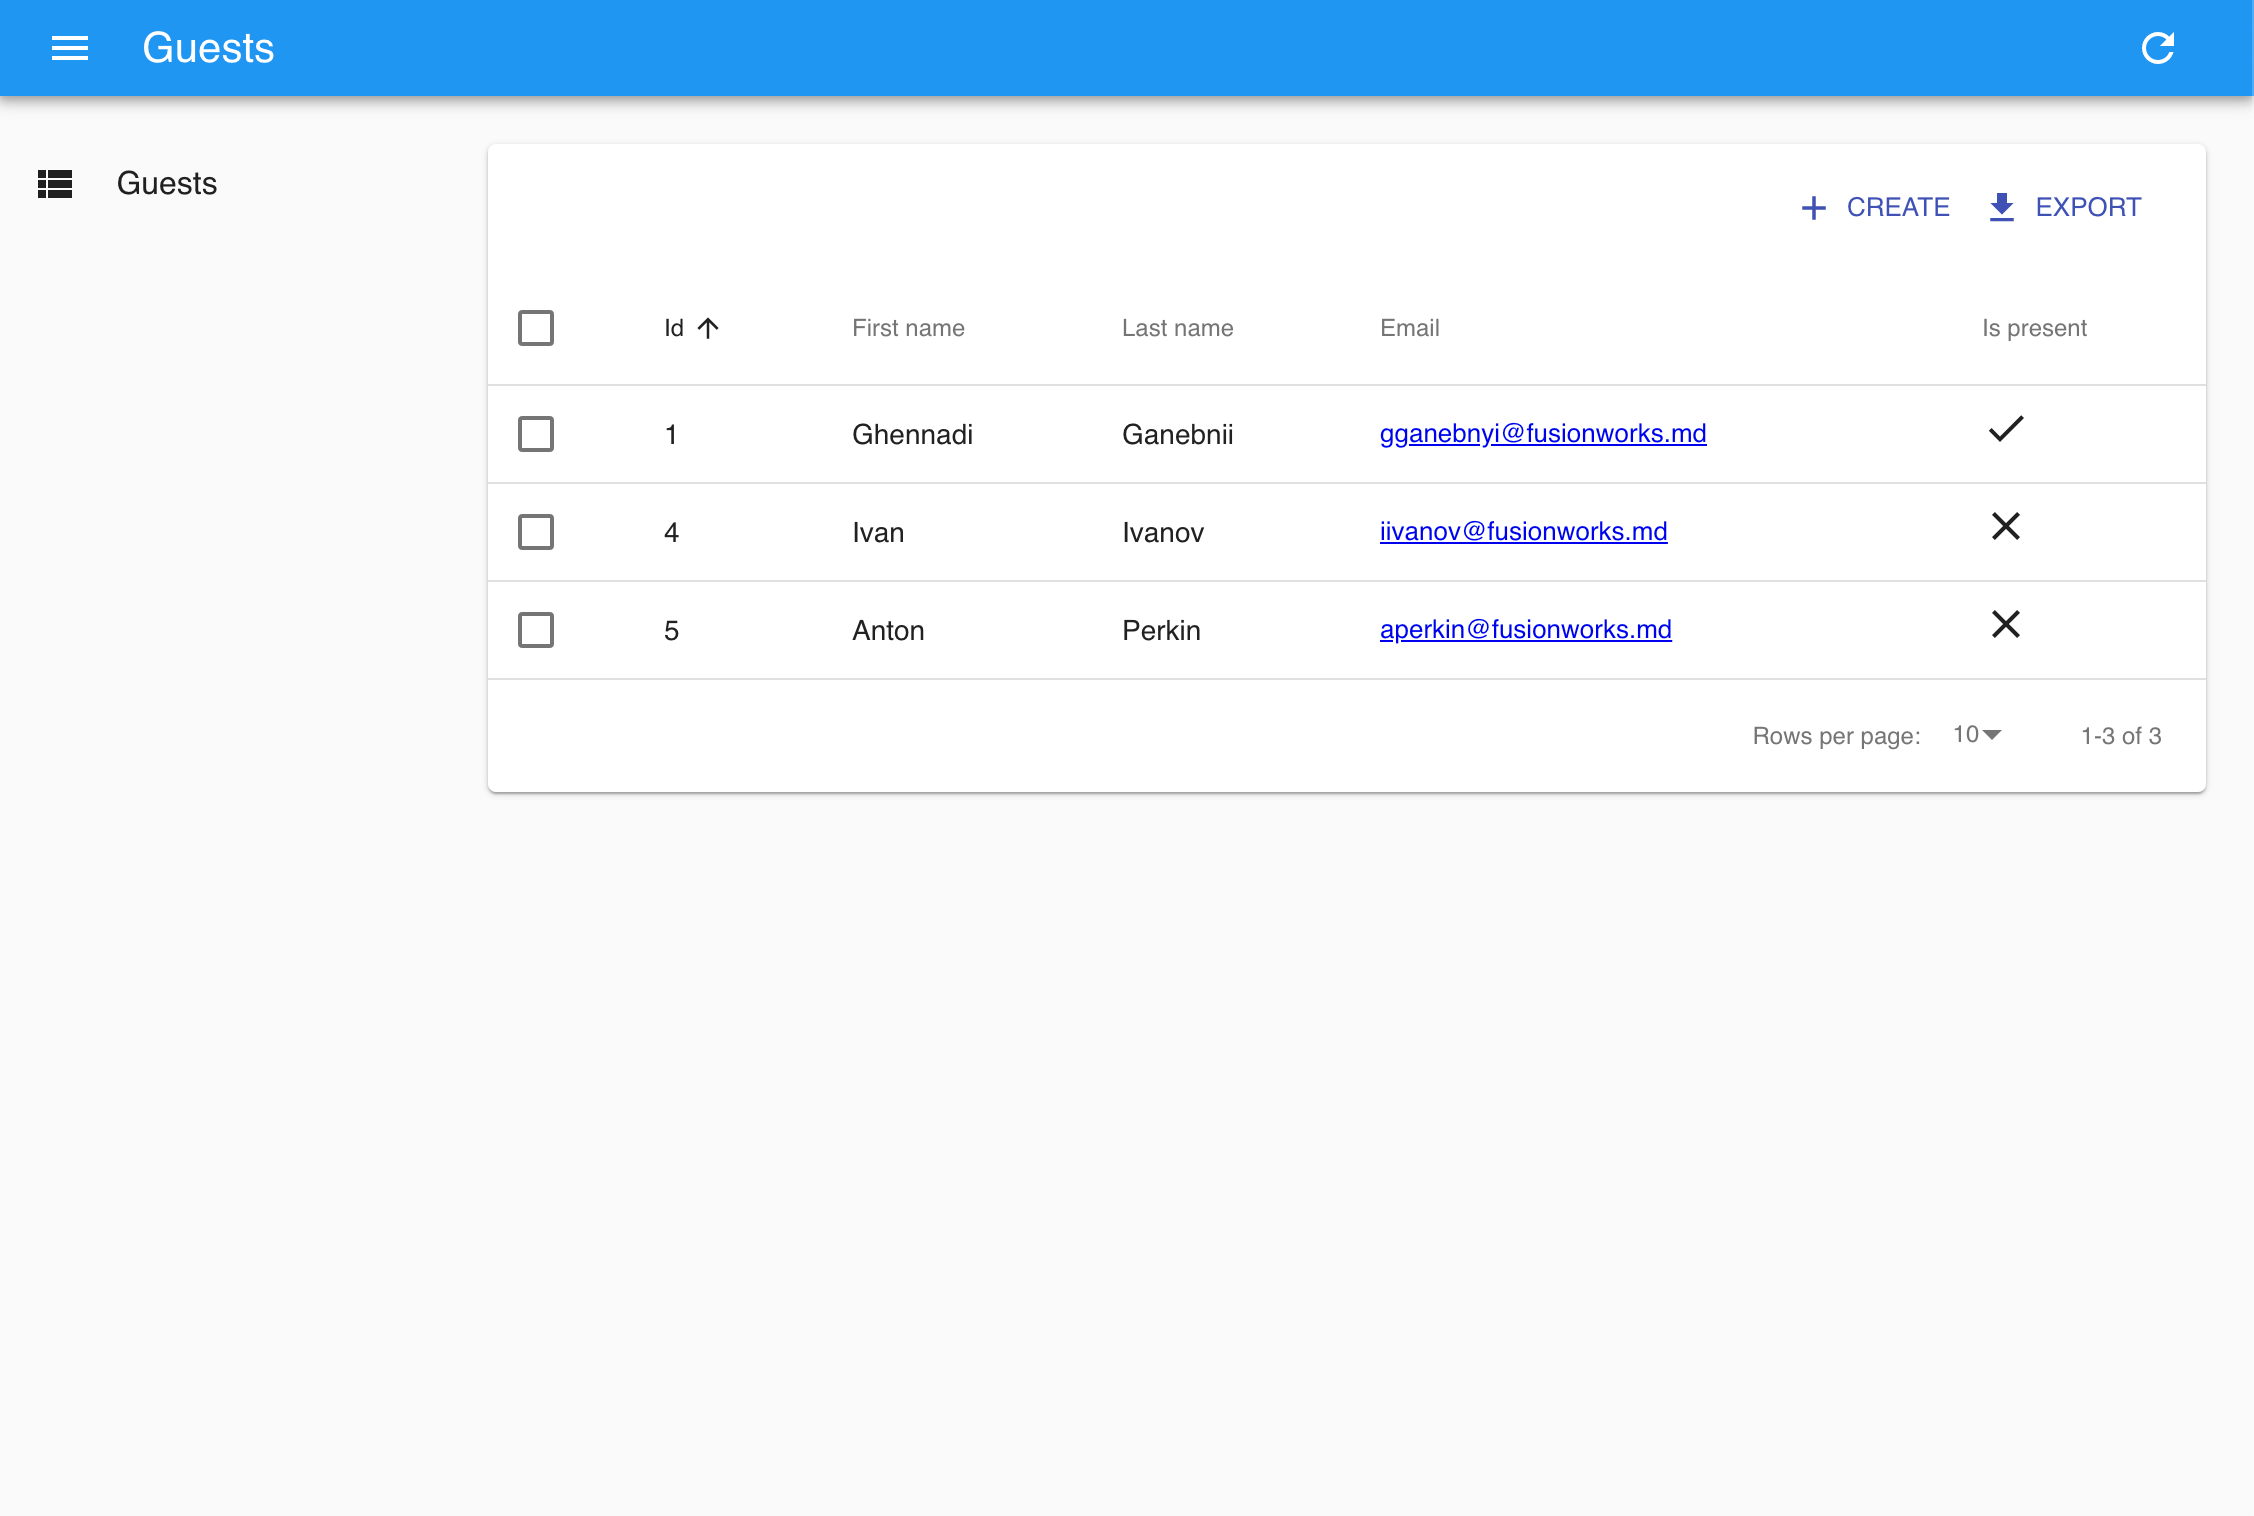
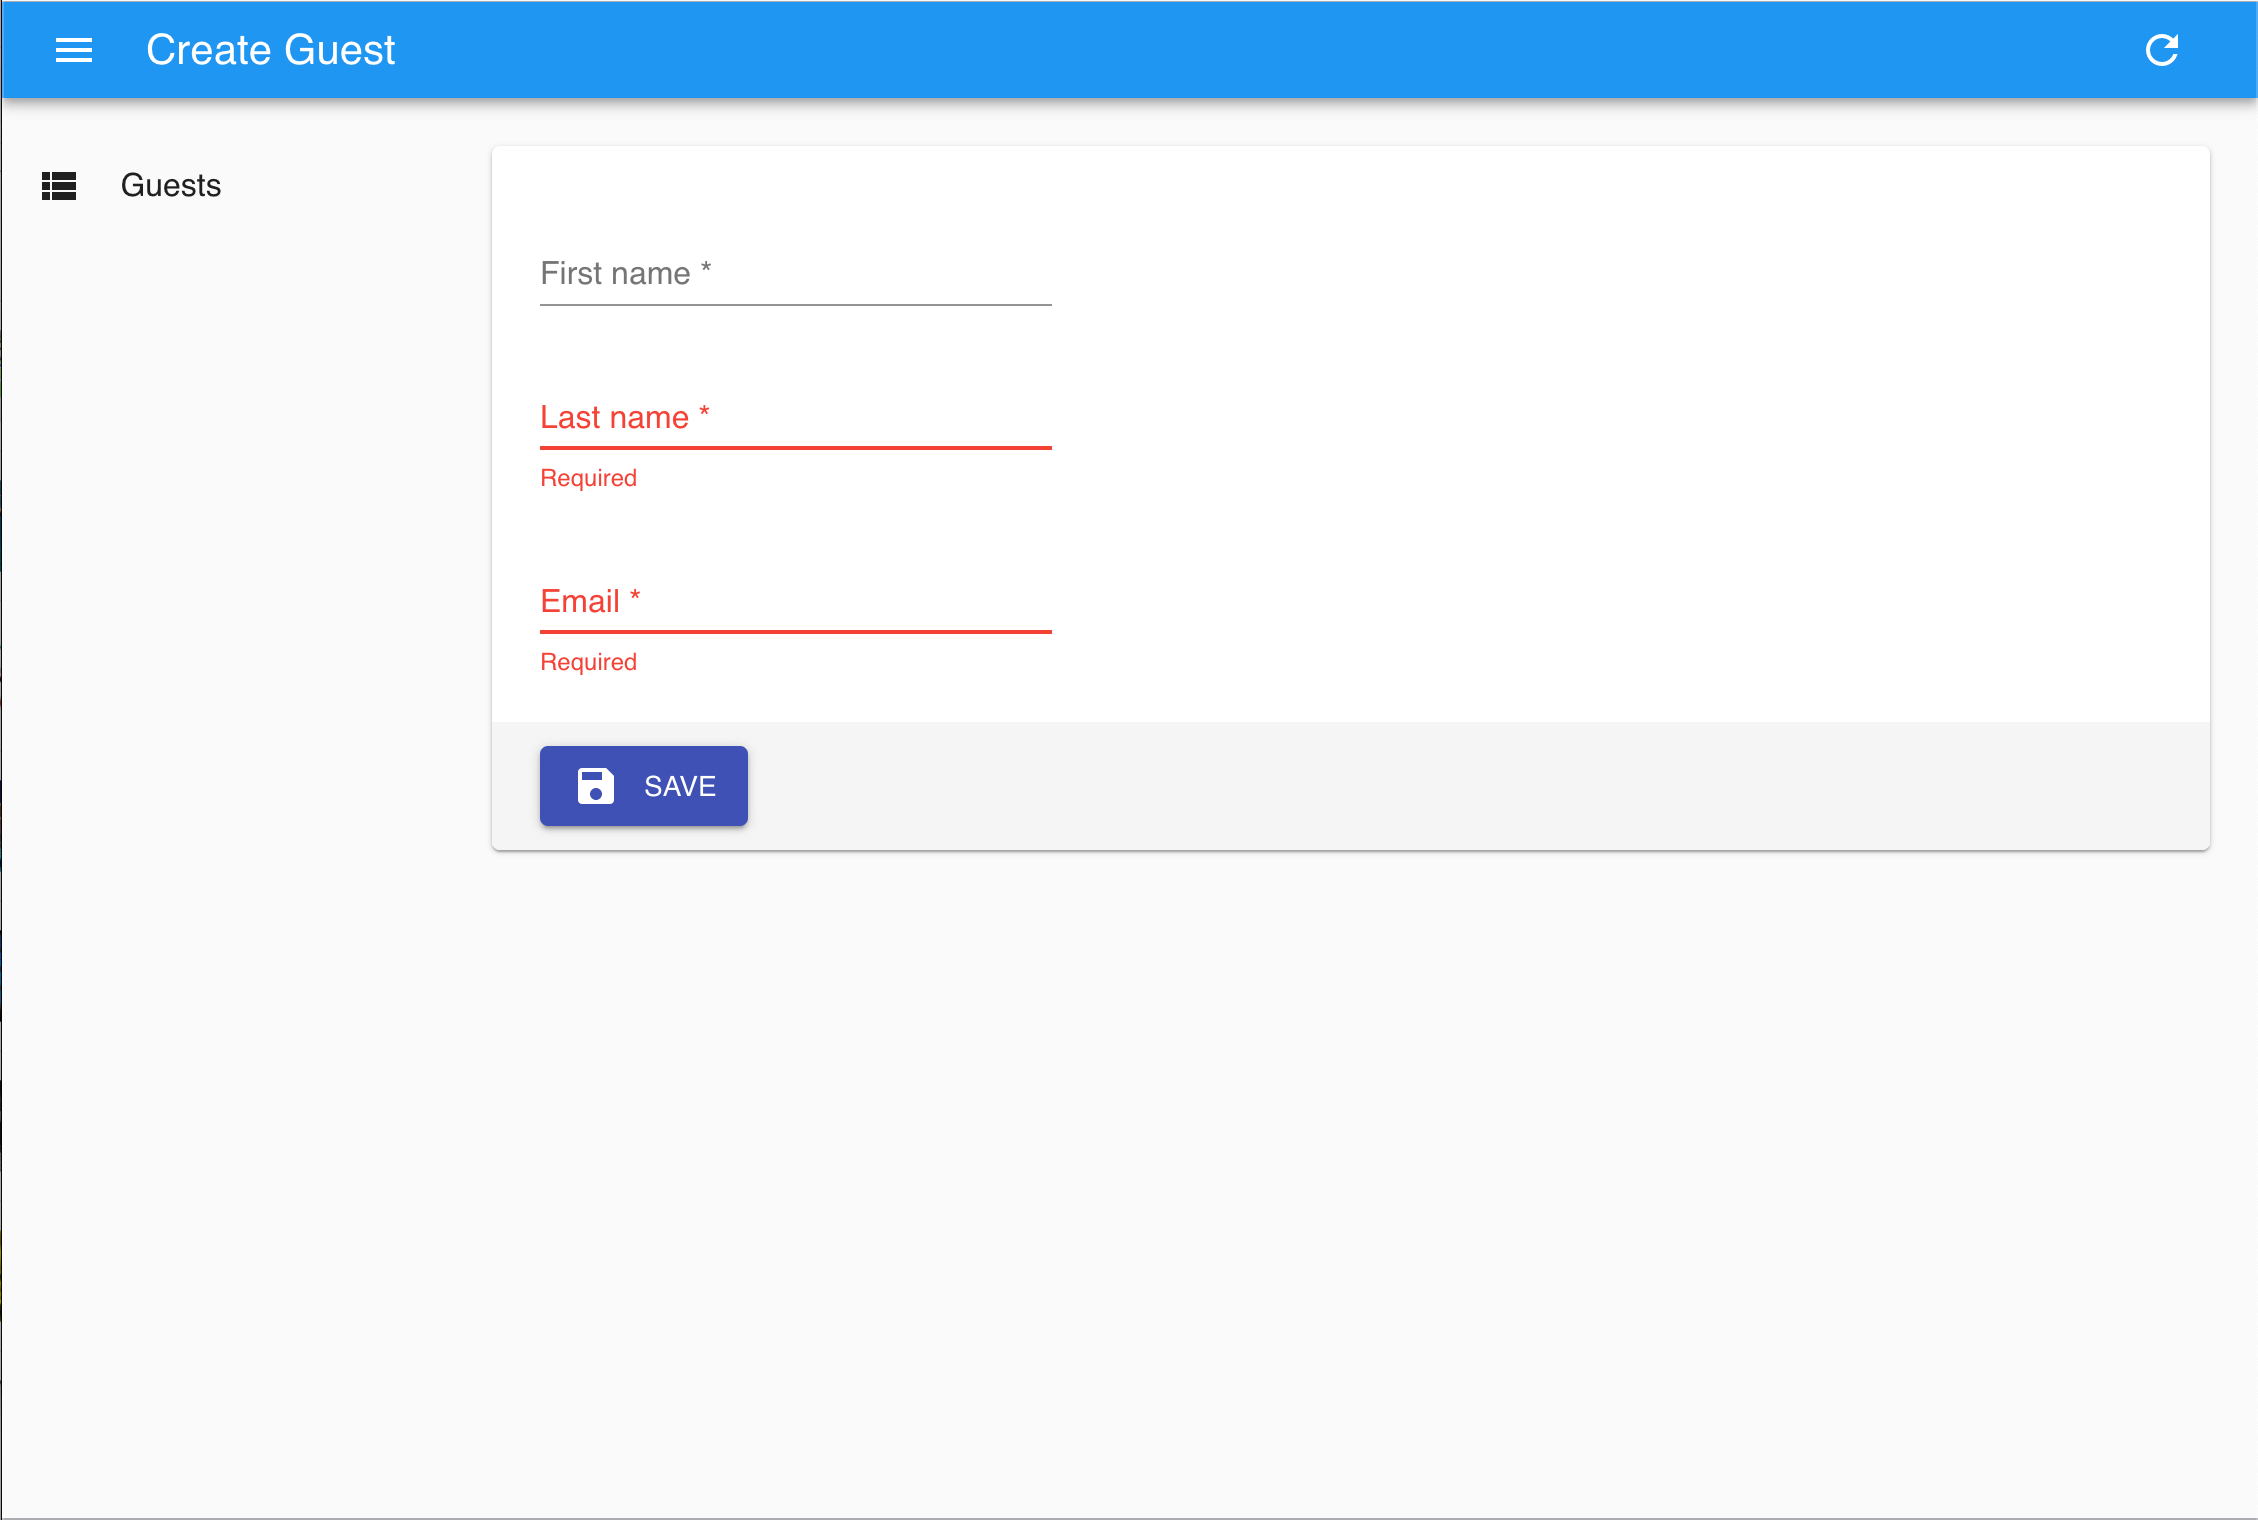
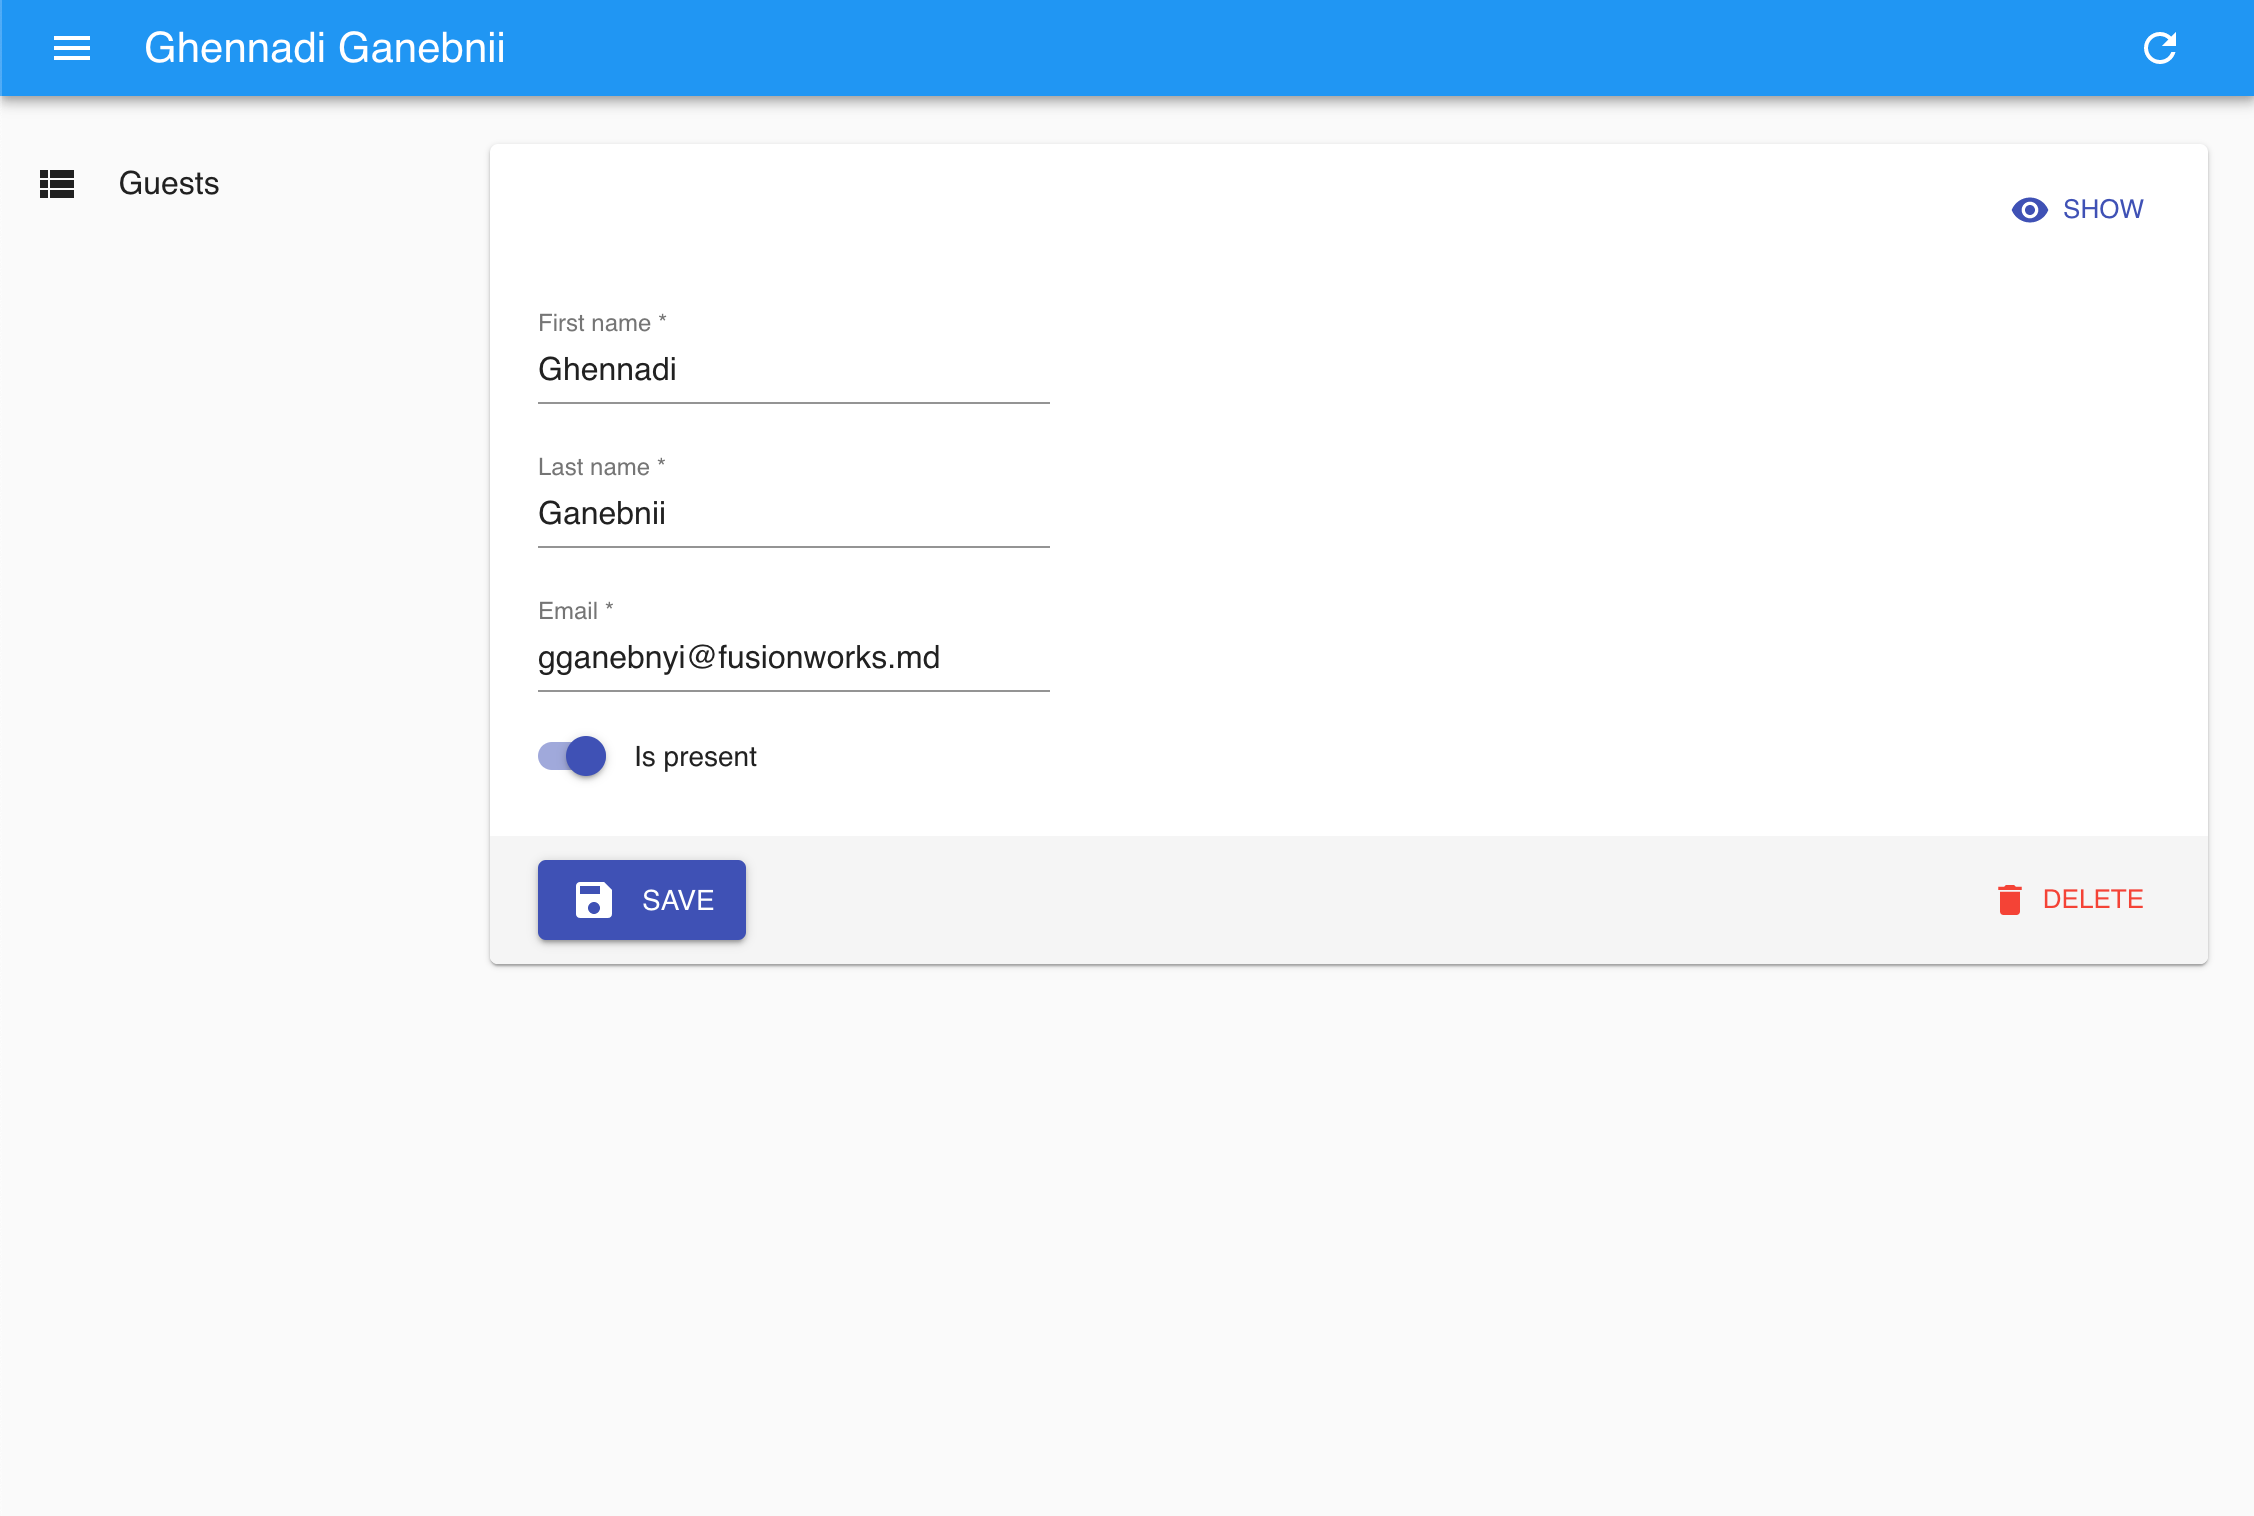
For demo purposes, we will create a simple application for managing guests list. This will include creating guests, showing list and updating guests info.
So let’s start.
Creating API
For creating API we will use NestJS framework. I enjoy NestJS because it is TypeScript based and thus allows producing better readable, better structured and less error prone backend code.
We will use NestJS CLI tool to initialize our backend:
npm i -g @nestjs/cli
nest new api
cd api
Now when the project skeleton is ready we will add other dependencies we need.
We will use TypeORM (again TypeScript) for working with MySQL:
yarn add @nestjs/typeorm typeorm mysql class-validator class-transformer
NestJS CRUD library to simplify our endpoints creation:
yarn add @nestjsx/crud
And NestJS Config for managing our application configuration:
yarn add nestjs-config
Once done with dependencies lets generate the skeleton of our Guests API endpoint
Not so fast 🙂 Later on React Admin will require CORS to be enabled on API side. So we need to modify src/main.ts. And by the way lets make React’s life easier and free 3000 port!
import { NestFactory } from '@nestjs/core';
import { AppModule } from './app.module';
async function bootstrap() {
const app = await NestFactory.create(AppModule, { cors: true });
await app.listen(3001);
}
bootstrap();
Now it is really ready!
yarn start
and continue to creating out administration panel UI.
Creating Admin UI
As mentioned before for this purpose we will use React Admin — a React based component library for creating admin-like interfaces.
Let’s start with initializing a React applicationn
pm install -g create-react-app
create-react-app admin-ui
cd admin-ui
After this we are redy to initializing React Admin component and create guest editor. First, we update src/App.js with root Admin component and Resource component for guests:
Please note that we are using React Admin’s ListGuesser and ShowGuesser for list and show veiws. If needed they could be replaced with custom implementation same way as create and edit forms below.
So far everything looks great, but we have not yet touched such things as authentication, authorization, cases when database and API models should differ, etc. I will cover them in the next articles and we’ll if this stack survives nicely. So stay tuned to the FusionWorks: