Creating admin-like web applications with NestJS and React Admin. Part 1.
Introduction
In this series of articles, I will describe how to quickly bootstrap an API-based administration panel for your project using NestJS and React Admin.
In order to proceed further (in casу you are not reading just for fun), you may need to have NodeJS 10+, npm, yarn and MySQL installed on your computer. Also, you should have some basic knowledge of TypeScript and React.
Our project will consist of 2 part:
- REST API, written in TypeScript
- Admin panel, written in React
For demo purposes, we will create a simple application for managing guests list. This will include creating guests, showing list and updating guests info.
So let’s start.
Creating API
For creating API we will use NestJS framework. I enjoy NestJS because it is TypeScript based and thus allows producing better readable, better structured and less error prone backend code.
We will use NestJS CLI tool to initialize our backend:
npm i -g @nestjs/cli
nest new api
cd api
Now when the project skeleton is ready we will add other dependencies we need.
We will use TypeORM (again TypeScript) for working with MySQL:
yarn add @nestjs/typeorm typeorm mysql class-validator class-transformerNestJS CRUD library to simplify our endpoints creation:
yarn add @nestjsx/crudAnd NestJS Config for managing our application configuration:
yarn add nestjs-configOnce done with dependencies lets generate the skeleton of our Guests API endpoint
nest generate module guests
nest generate controller guests
nest generate service guests
And create a model class for our guest entity (src/guests/guest.entity.ts)
import { Entity, Column, PrimaryGeneratedColumn } from ‘typeorm’;
import { IsEmail } from ‘class-validator’;
@Entity({ name: 'guests' })
export class GuestEntity {
@PrimaryGeneratedColumn()
id: number;
@Column()
firstName: string;

@Column()
lastName: string;

@Column({
unique: true,
})
@IsEmail()
email: string;

@Column({ default: false })
isPresent: boolean;
}
Now we add some code to wire parts together
Update src/guests/guests.module.ts with TypeORM dependencies
import { Module } from '@nestjs/common';
import { TypeOrmModule } from '@nestjs/typeorm';
import { GuestsController } from './guests.controller';
import { GuestEntity } from './guest.entity';
import { GuestsService } from './guests.service';
@Module({
imports: [
TypeOrmModule.forFeature([GuestEntity]),
],
controllers: [
GuestsController,
],
providers: [
GuestsService,
],
})
export class GuestsModule { }
Make src/guests/guests.service.ts extend RepositoryService from NestJS CRUD
import { Injectable } from '@nestjs/common';
import { GuestEntity } from './guest.entity';
import { RepositoryService } from '@nestjsx/crud/typeorm';
import { InjectRepository } from '@nestjs/typeorm';@Injectable()
export class GuestsService extends RepositoryService<GuestEntity> {
constructor(@InjectRepository(GuestEntity) repository) {
super(repository);
}
}
and add it to src/guests/guests.controller.ts. Also, add Crud decorator to the controller in order to enable NestJS CRUD API-related features.
import { Controller } from '@nestjs/common';
import { Crud } from '@nestjsx/crud';
import { GuestsService } from './guests.service';
import { GuestEntity } from './guest.entity';@Crud(GuestEntity)
@Controller('guests')
export class GuestsController {
constructor(public service: GuestsService) { }
}
Finally, we configure TypeORM in the main module (src/app.module.ts):
import { Module } from '@nestjs/common';
import { ConfigModule, ConfigService } from 'nestjs-config';
import { TypeOrmModule } from '@nestjs/typeorm';
import { AppController } from './app.controller';
import { AppService } from './app.service';
import { GuestsModule } from './guests/guests.module';
import * as path from 'path';@Module({
imports: [
ConfigModule.load(path.resolve(__dirname, 'config', '*.{ts,js}')),
TypeOrmModule.forRootAsync({
useFactory: (config: ConfigService) => config.get('database'),
inject: [ConfigService],
}),
 GuestsModule,
],
controllers: [
AppController,
],
providers: [
AppService,
],
})
export class AppModule { }
And add the appropriate configuration files
export default {
host: process.env.DB_HOST,
type: 'mysql',
port: process.env.DB_PORT || 3306,
username: process.env.DB_USER,
password: process.env.DB_PASSWORD,
database: process.env.DB_DATABASE,
entities: ['src/**/*.entity{.ts,.js}'],
synchronize: process.env.DB_SYNCRONIZE === 'true',
logging: process.env.DB_LOGGING === 'true',
};
.env:
DB_HOST = localhost
DB_PORT = 3306
DB_USER =
DB_PASSWORD =
DB_DATABASE =
DB_SYNCRONIZE = true
DB_LOGGING = true
And we are ready to start!
Not so fast 🙂 Later on React Admin will require CORS to be enabled on API side. So we need to modify src/main.ts. And by the way lets make React’s life easier and free 3000 port!
import { NestFactory } from '@nestjs/core';
import { AppModule } from './app.module';
async function bootstrap() {
const app = await NestFactory.create(AppModule, { cors: true });
await app.listen(3001);
}
bootstrap();
Now it is really ready!
yarn startand continue to creating out administration panel UI.
Creating Admin UI
As mentioned before for this purpose we will use React Admin — a React based component library for creating admin-like interfaces.
Let’s start with initializing a React applicationn
pm install -g create-react-app
create-react-app admin-ui
cd admin-ui
Then add React Admin to the project
yarn add react-admin prop-types
and a small library developed by us (FusionWorks): @FusionWorks/ra-data-nest-crud, which integrates React Admin with our NestJS CRUD-based backend.
yarn add @fusionworks/ra-data-nest-crudAfter this we are redy to initializing React Admin component and create guest editor. First, we update src/App.js with root Admin component and Resource component for guests:
import React from 'react';
import { Admin, Resource, ShowGuesser, ListGuesser } from 'react-admin';
import crudProvider from '@fusionworks/ra-data-nest-crud';
import { GuestCreate, GuestEdit } from './Guests';const dataProvider = crudProvider('http://localhost:3001');
const App = () => (
<Admin dataProvider={dataProvider}>
<Resource name="guests" list={ListGuesser} create={GuestCreate} edit={GuestEdit} show={ShowGuesser} />
</Admin>
);
export default App;
Then add corresponding forms to src/Guests/index.js.
Please note that we are using React Admin’s ListGuesser and ShowGuesser for list and show veiws. If needed they could be replaced with custom implementation same way as create and edit forms below.
import React from 'react';
import {
Create,
SimpleForm,
TextInput,
BooleanInput,
Edit,
Filter,
required,
email,
} from 'react-admin';const validateEmail = [required(), email()];
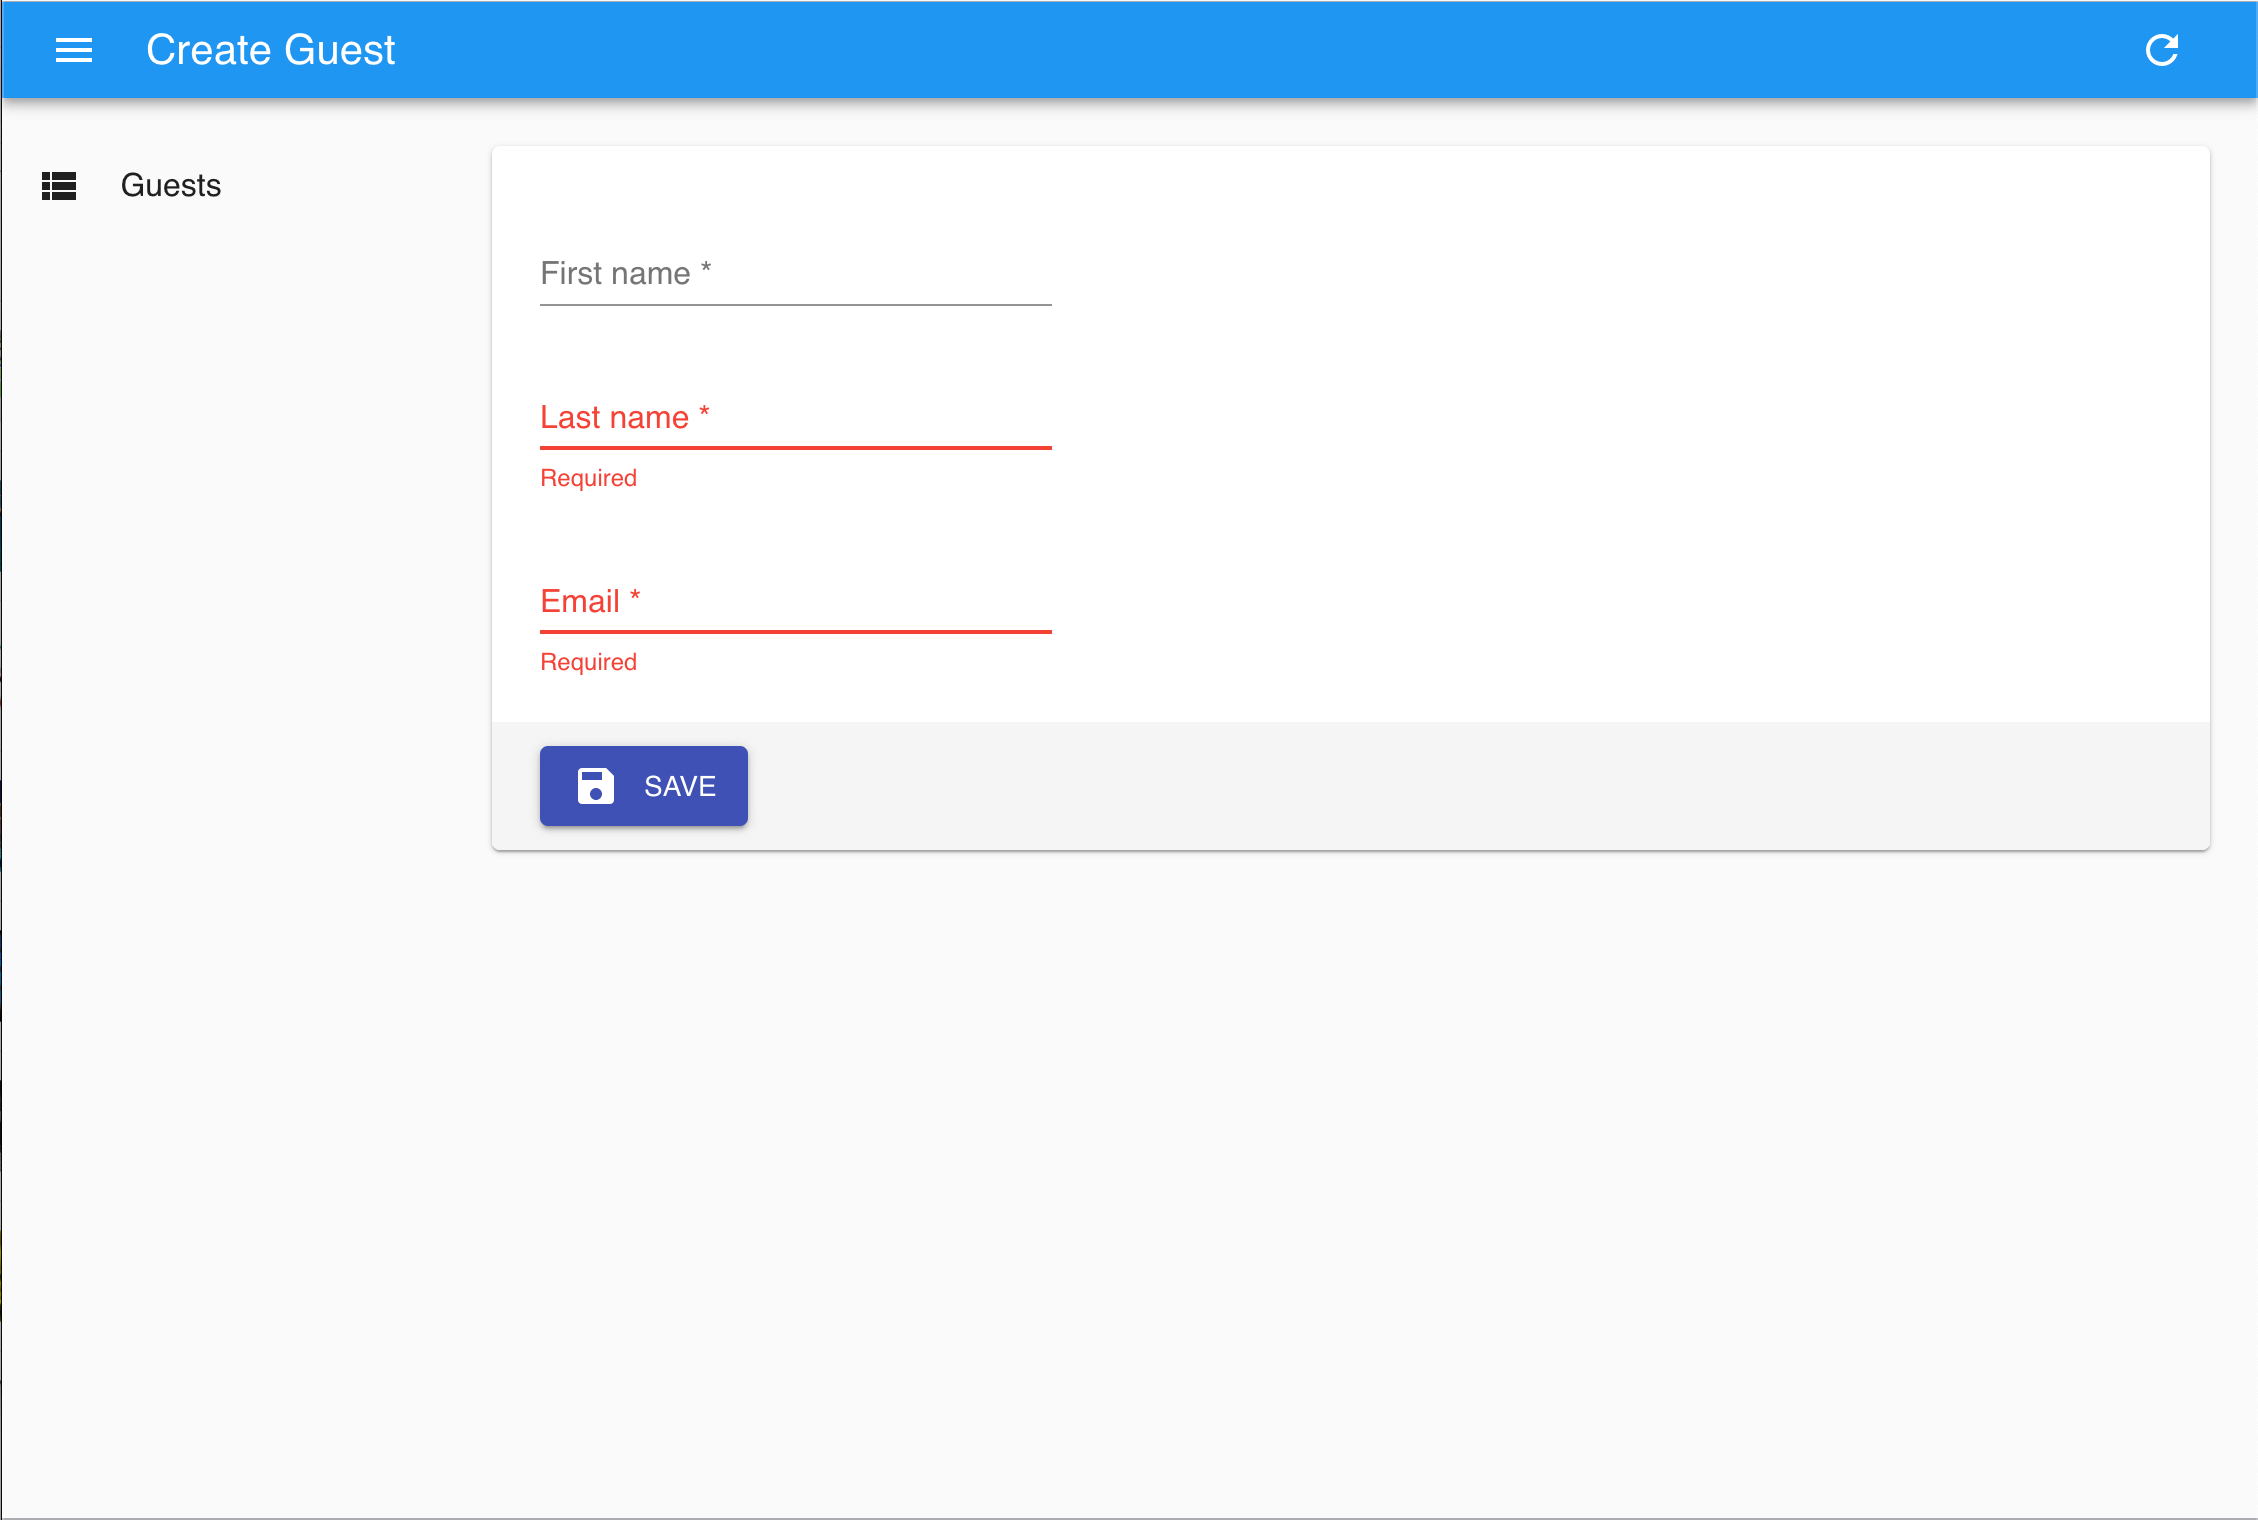
const validateRequired = required();export const GuestCreate = props => (
<Create {...props}>
<SimpleForm redirect="show">
<TextInput source="firstName" validate={validateRequired} />
<TextInput source="lastName" validate={validateRequired} />
<TextInput source="email" validate={validateEmail} />
</SimpleForm>
</Create>
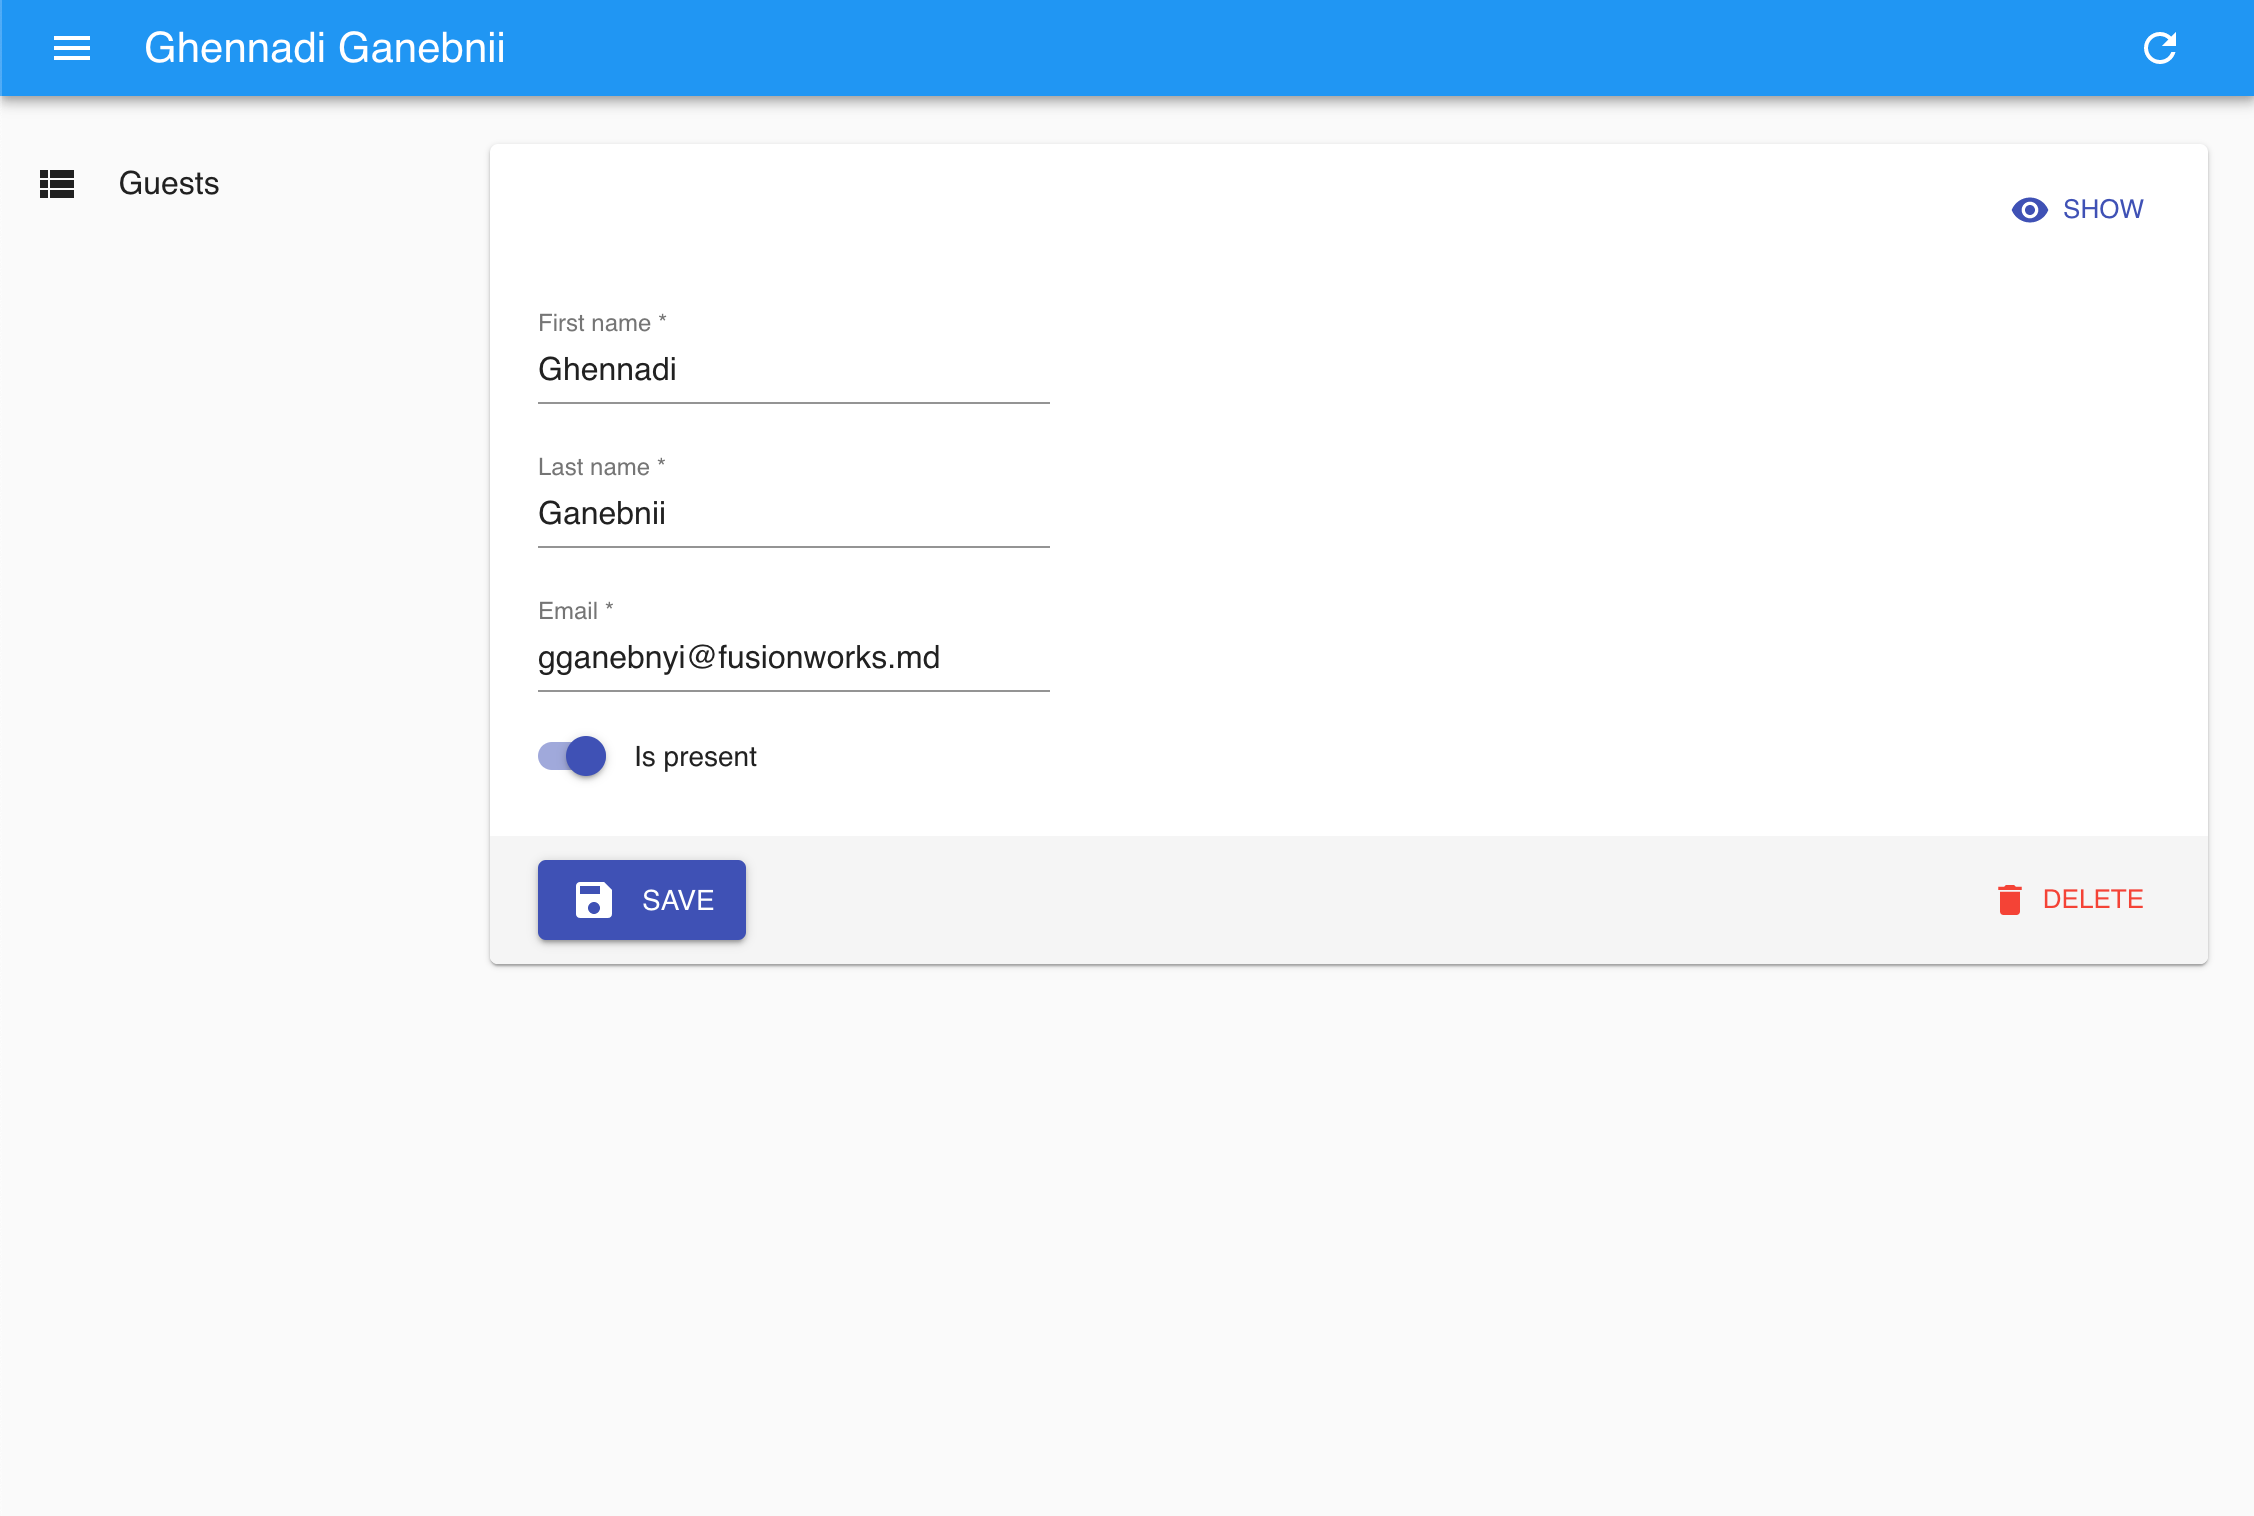
);const GuestEditTitle = ({ record }) => (<span>{`${record.firstName} ${record.lastName}`}</span>);export const GuestEdit = props => (
<Edit {...props} title={<GuestEditTitle />}>
<SimpleForm redirect="list">
<TextInput source="firstName" validate={validateRequired} />
<TextInput source="lastName" validate={validateRequired} />
<TextInput source="email" validate={validateEmail} />
<BooleanInput source="isPresent" />
</SimpleForm>
</Edit>
);Once done with this, we are ready to rock!
yarn start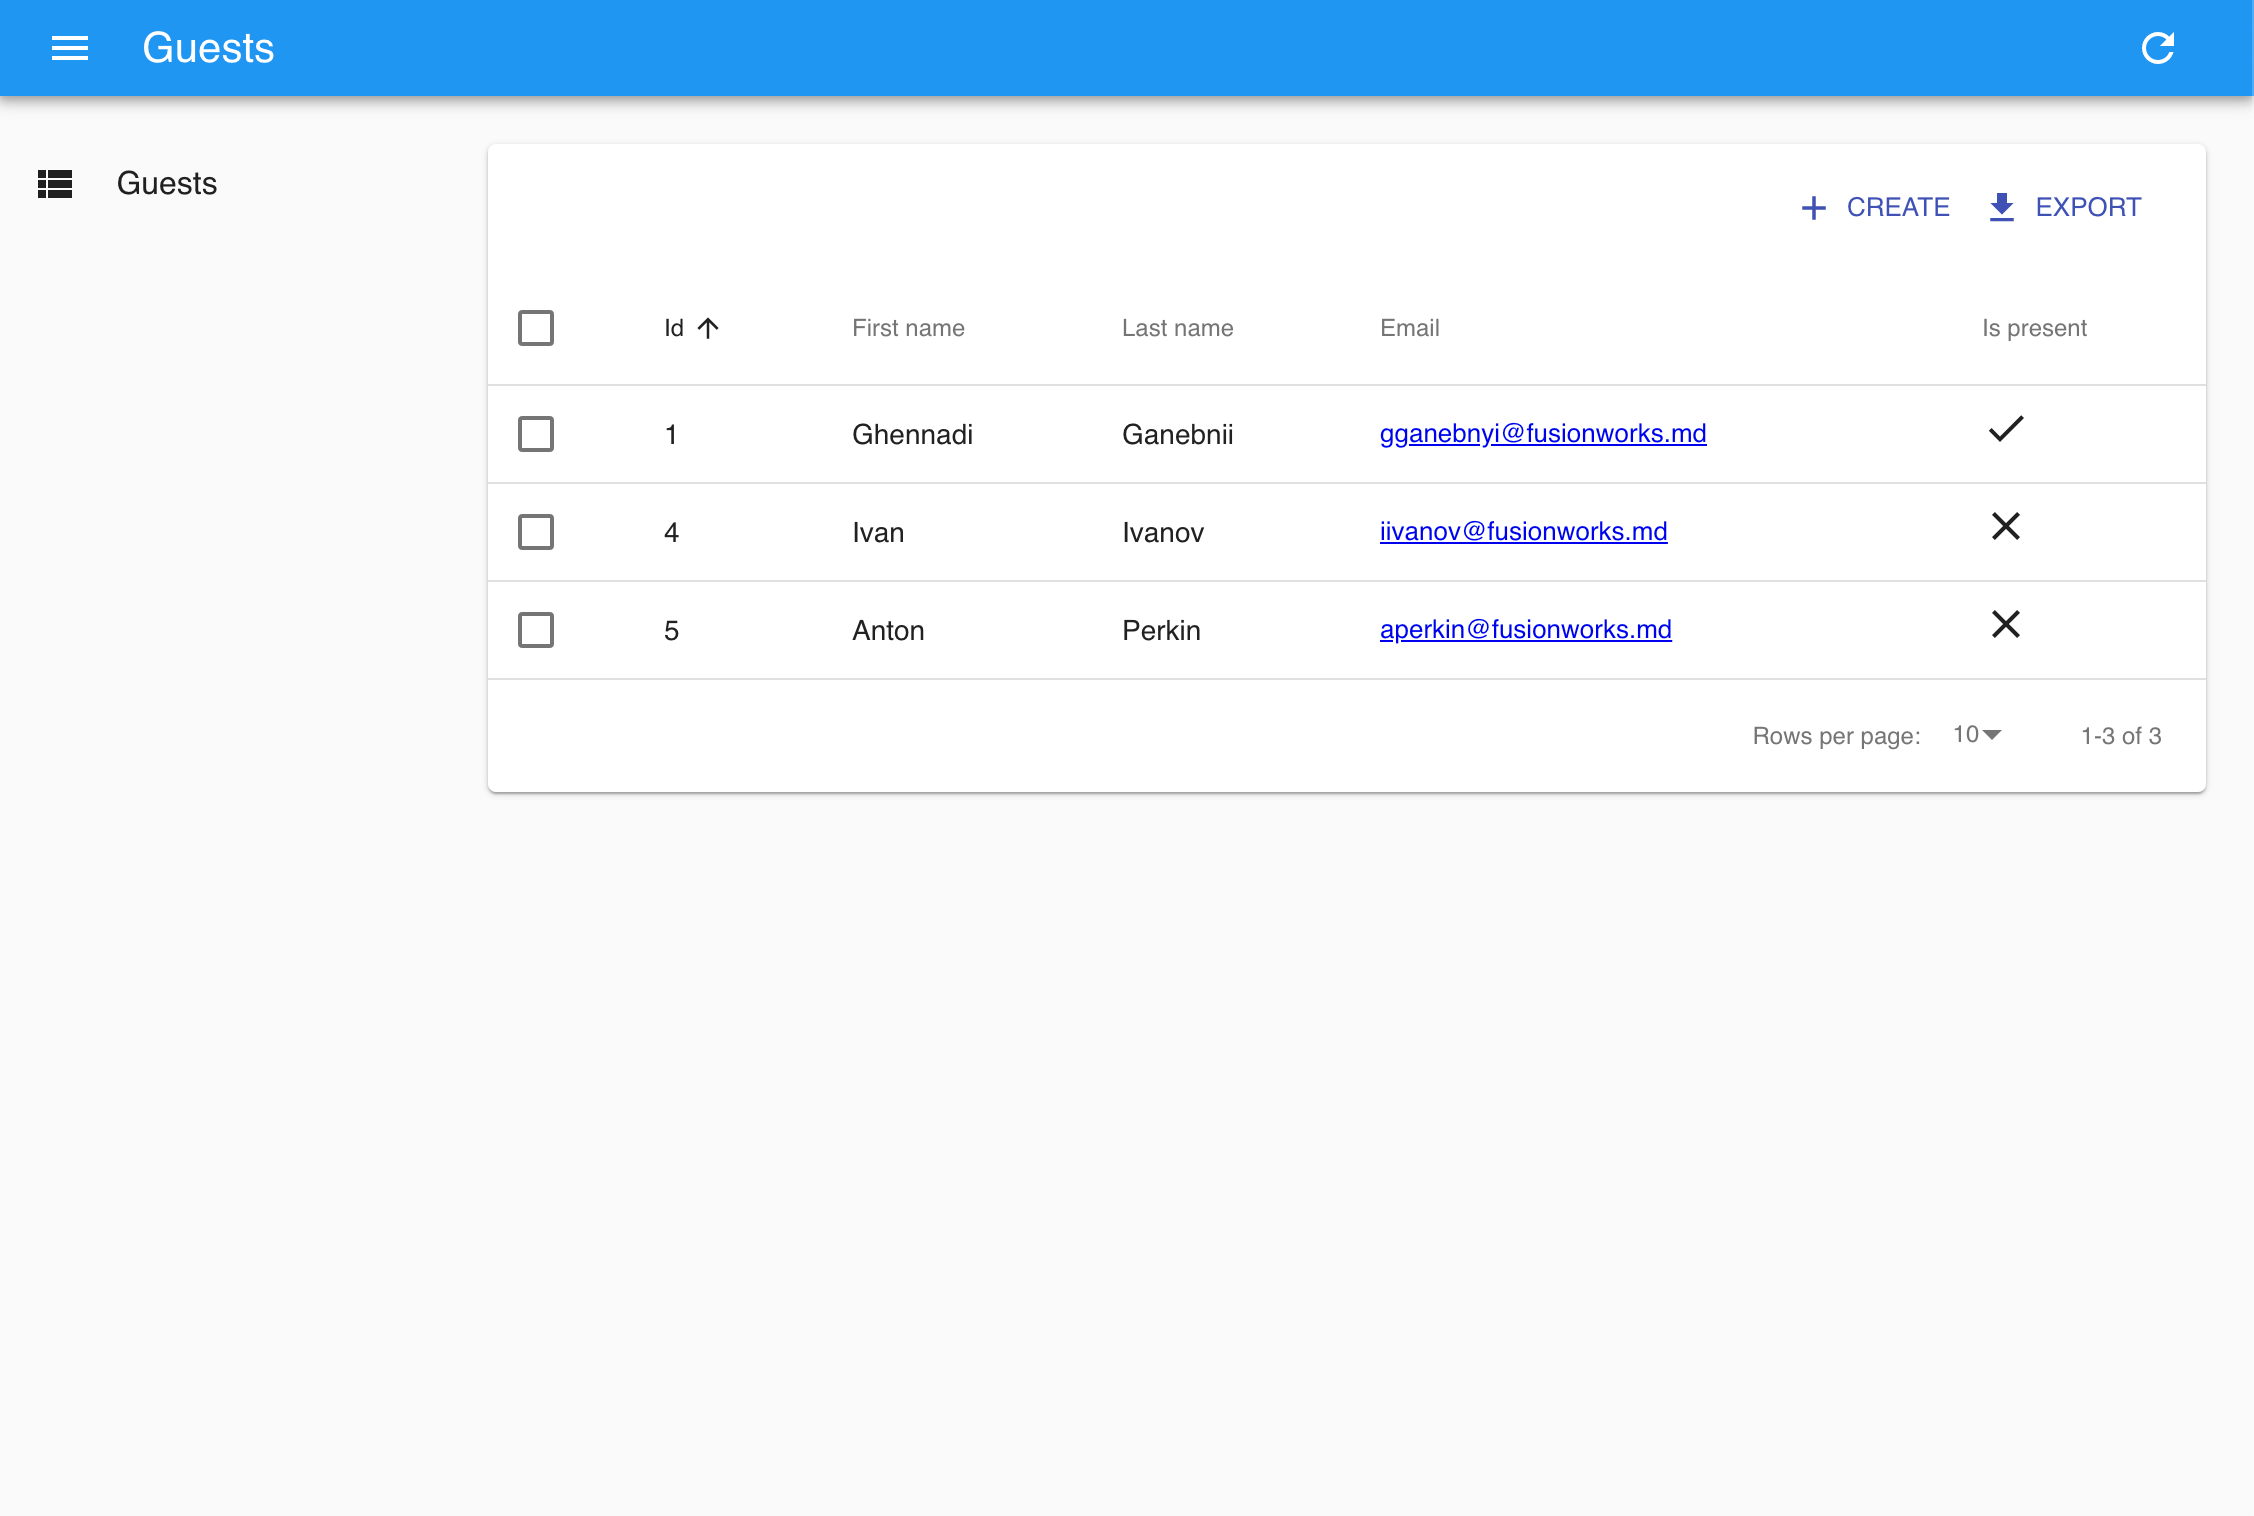
Conclusion
So far everything looks great, but we have not yet touched such things as authentication, authorization, cases when database and API models should differ, etc. I will cover them in the next articles and we’ll if this stack survives nicely. So stay tuned to the FusionWorks:
- http://fusionworks.md/
- https://www.facebook.com/FusionWorksMD/
- https://www.linkedin.com/company/fusionworks-moldova
- https://medium.com/fusionworks
Useful links
Source code for the article: https://github.com/FusionWorks/nestjs-crud-react-admin-boilerplate
If you want to dive dipper yourself here is the set of links to documentation that might be useful for you:
- NestJS: https://docs.nestjs.com/
- NestJS CRUD: https://github.com/nestjsx/crud
- React Admin: https://marmelab.com/react-admin/